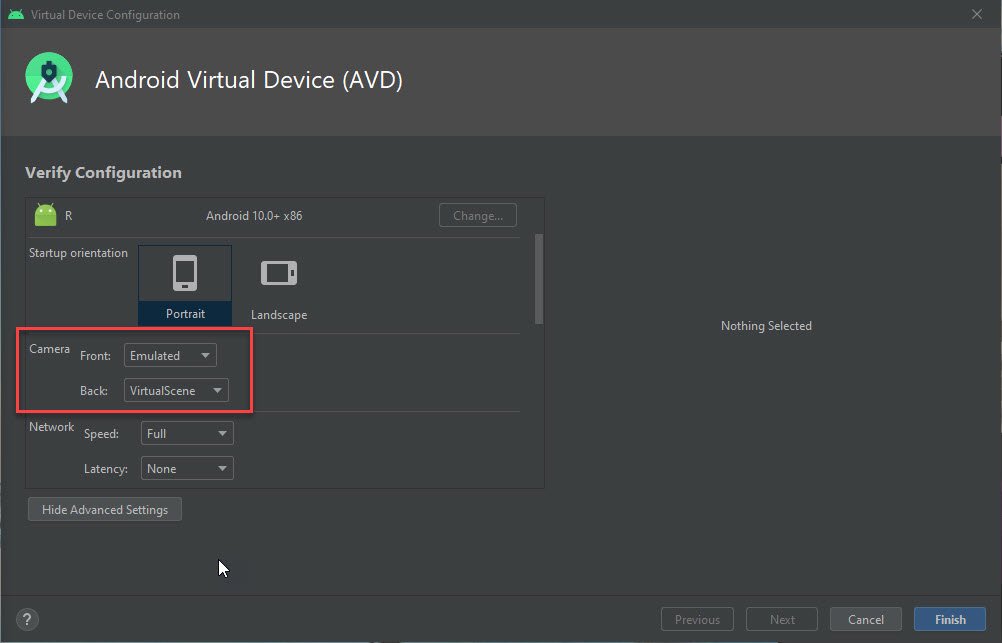
- ไปตั้งค่า AVD Manager ตั้งค่า Emulator เลือก Show Advance Setting ..ตั้งค่า Camera Back ให้เป็น VirtualScene แล้ว Save
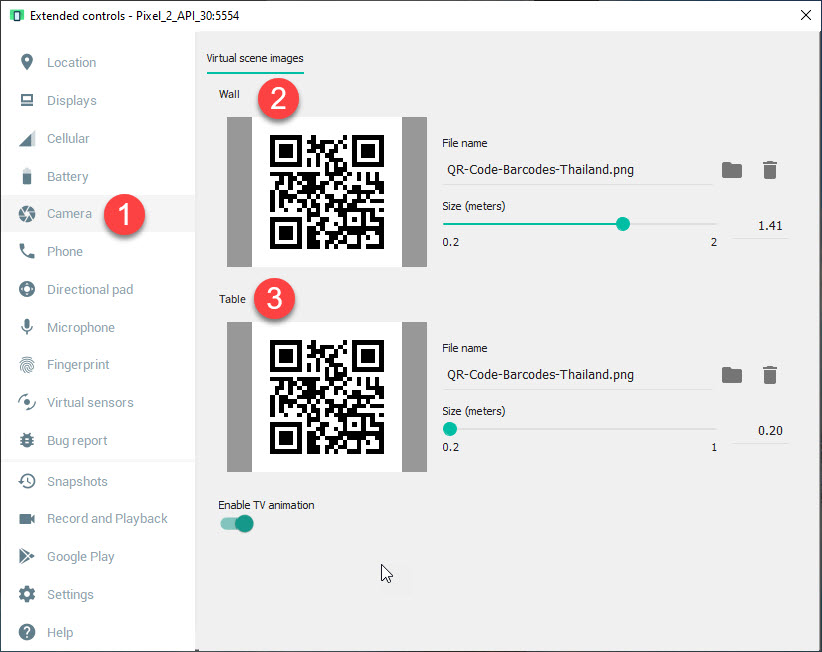
- ให้เปิด Run Emulator หลังจากนั้นไป … เพื่อตั้งค่า แล้วเลือก Camera ให้ใส่ QR Code บน Wall และ Table
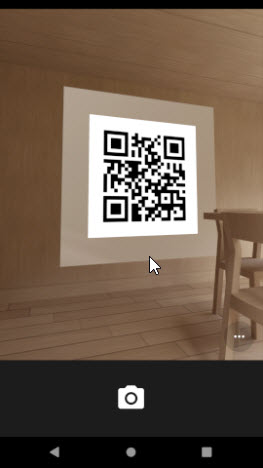
- เปิด app กล้องบน emulator แล้วกด alt+WASD เดินแบบเกมส์ไปในห้องที่มีผนังแสดง QR Code
- หลังจากตั้งค่าพร้อมใช้งานกล้องบน Emulator เรียบร้อย ให้เปิด Android Studio เพื่อสร้าง App Week3_barcode
- อ้างอิงการใช้งาน plugin จากเว็บ https://pub.flutter-io.cn/packages/flutter_barcode_scanner/example
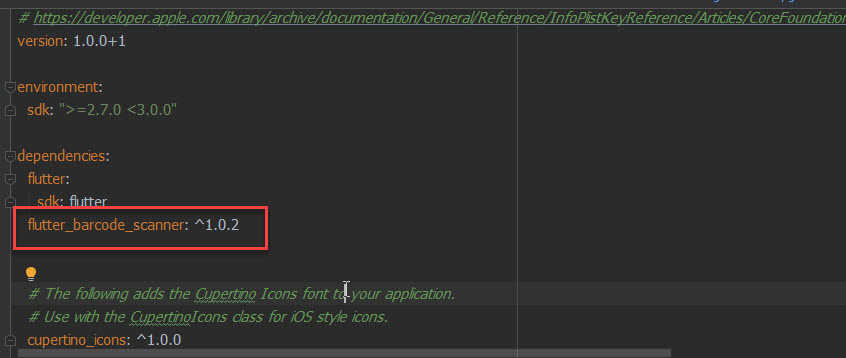
- ทำการแก้ไขไฟล์ใน pubspec.yaml เพิ่ม ลงไป แล้วกด pub get ด้านบน (หรือพิมพ์ใน cmd ว่า flutter pub get ด้วย)
- แก้ไขไฟล์ Main.dart
import 'dart:async';

import 'package:flutter/material.dart';
import 'package:flutter/services.dart';
import 'package:flutter_barcode_scanner/flutter_barcode_scanner.dart';

void main() => runApp(MyApp());

class MyApp extends StatefulWidget {
  @override
  _MyAppState createState() => _MyAppState();
}

class _MyAppState extends State<MyApp> {
  String _scanBarcode = 'Unknown';

  @override
  void initState() {
    super.initState();
  }

  startBarcodeScanStream() async {
    FlutterBarcodeScanner.getBarcodeStreamReceiver(
            "#ff6666", "Cancel", true, ScanMode.BARCODE)
        .listen((barcode) => print(barcode));
  }

  Future<void> scanQR() async {
    String barcodeScanRes;
    // Platform messages may fail, so we use a try/catch PlatformException.
    try {
      barcodeScanRes = await FlutterBarcodeScanner.scanBarcode(
          "#ff6666", "Cancel", true, ScanMode.QR);
      print(barcodeScanRes);
    } on PlatformException {
      barcodeScanRes = 'Failed to get platform version.';
    }

    // If the widget was removed from the tree while the asynchronous platform
    // message was in flight, we want to discard the reply rather than calling
    // setState to update our non-existent appearance.
    if (!mounted) return;

    setState(() {
      _scanBarcode = barcodeScanRes;
    });
  }

  // Platform messages are asynchronous, so we initialize in an async method.
  Future<void> scanBarcodeNormal() async {
    String barcodeScanRes;
    // Platform messages may fail, so we use a try/catch PlatformException.
    try {
      barcodeScanRes = await FlutterBarcodeScanner.scanBarcode(
          "#ff6666", "Cancel", true, ScanMode.BARCODE);
      print(barcodeScanRes);
    } on PlatformException {
      barcodeScanRes = 'Failed to get platform version.';
    }

    // If the widget was removed from the tree while the asynchronous platform
    // message was in flight, we want to discard the reply rather than calling
    // setState to update our non-existent appearance.
    if (!mounted) return;

    setState(() {
      _scanBarcode = barcodeScanRes;
    });
  }

  @override
  Widget build(BuildContext context) {
    return MaterialApp(
        home: Scaffold(
            appBar: AppBar(title: const Text('Barcode scan')),
            body: Builder(builder: (BuildContext context) {
              return Container(
                  alignment: Alignment.center,
                  child: Flex(
                      direction: Axis.vertical,
                      mainAxisAlignment: MainAxisAlignment.center,
                      children: <Widget>[
                        RaisedButton(
                            onPressed: () => scanBarcodeNormal(),
                            child: Text("Start barcode scan")),
                        RaisedButton(
                            onPressed: () => scanQR(),
                            child: Text("Start QR scan")),
                        RaisedButton(
                            onPressed: () => startBarcodeScanStream(),
                            child: Text("Start barcode scan stream")),
                        Text('Scan result : $_scanBarcode\n',
                            style: TextStyle(fontSize: 20))
                      ]));
            })));
  }
}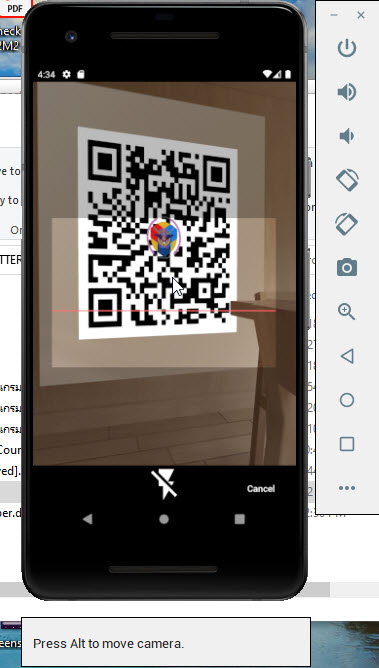
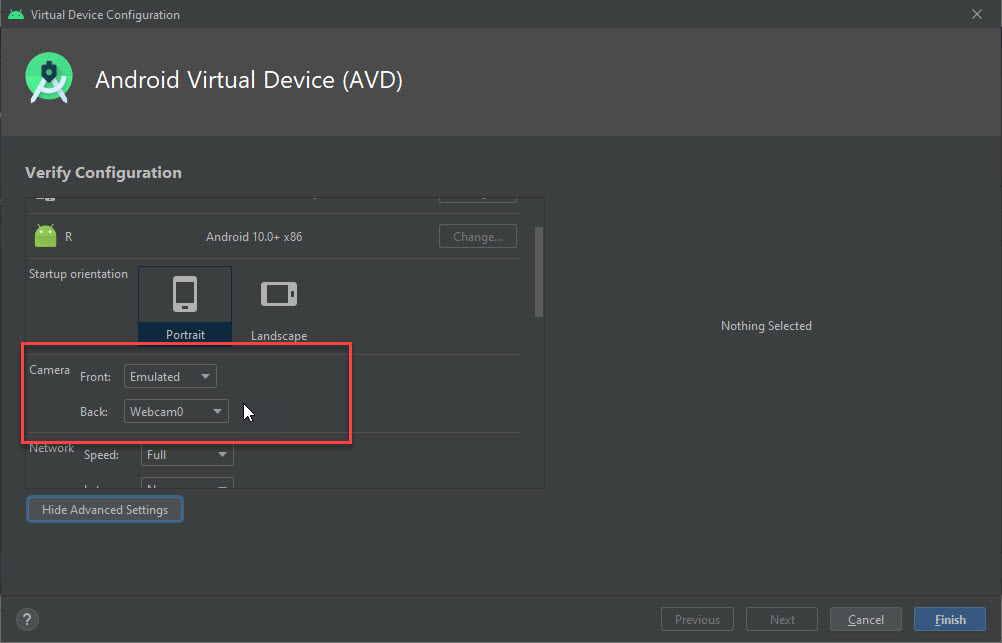
- เราสามารถตั้งค่ากล้อง webcam ให้เป็นกล้องของ Emulator ได้เพื่อทดสอบสแกน QR Code โดยเปิด AVD Manager แล้วตั้งค่า Camera อีกรอบ

Technology Web & Application