
1. เปิด Android studio
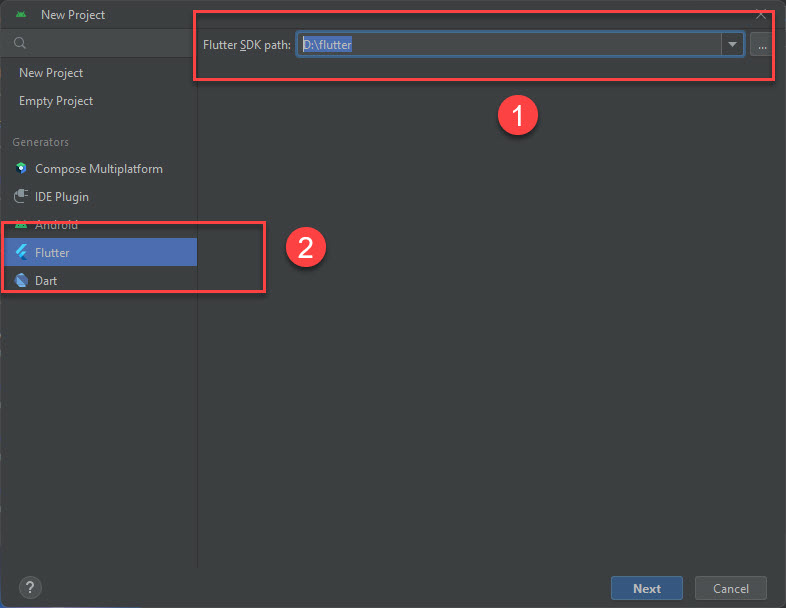
2. ทำการสร้าง project ใหม่ เลือก New FLutter Project (ถ้าไม่อยู๋หน้าแรกให้กด file->close project ก่อน)


import 'package:flutter/material.dart';
void main(){
  runApp(
    MaterialApp(
      home:Scaffold(
        appBar: AppBar(
          title: const Text('AppBar 222222'),
        ),
      ) ,
    )
  );
}
import 'package:flutter/material.dart';
void main(){
  runApp(
    MaterialApp(
      home:Scaffold(
        appBar: AppBar(
          title: const Text('AppBar 222222'),
          backgroundColor: Colors.deepOrange[100],
        ),
        body:const Image(image: NetworkImage('https://kungtee.com/wp-content/uploads/2023/12/2023-12-13_8-48-26.jpg')
        ),
      ) ,
    )
  );
}
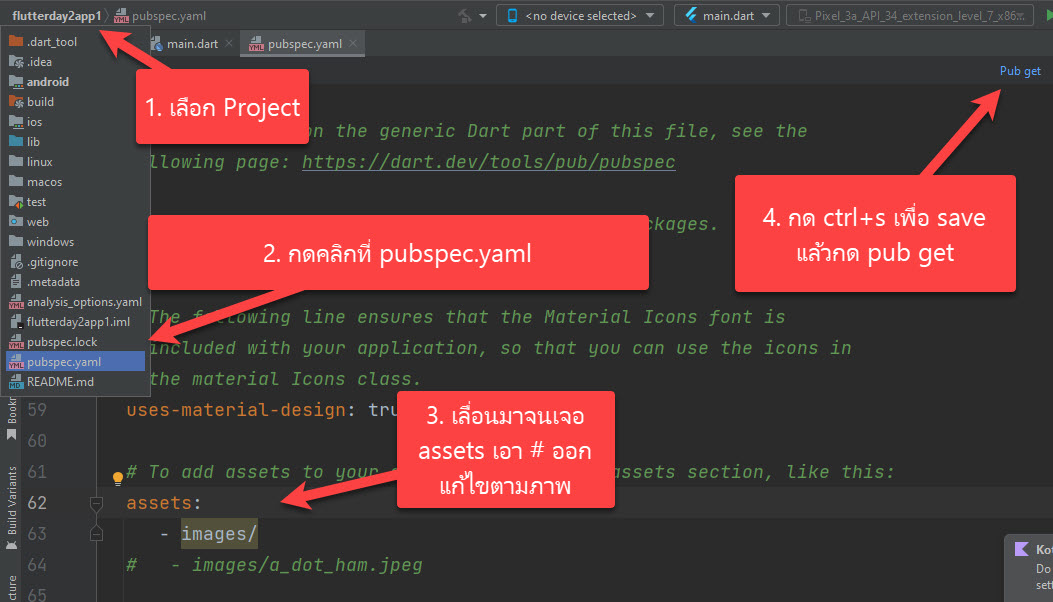
การจะเอาภาพในโปรเจ็คจะต้องไปแก้ไขไฟล์ pubspec.yaml ตามภาพก่อน
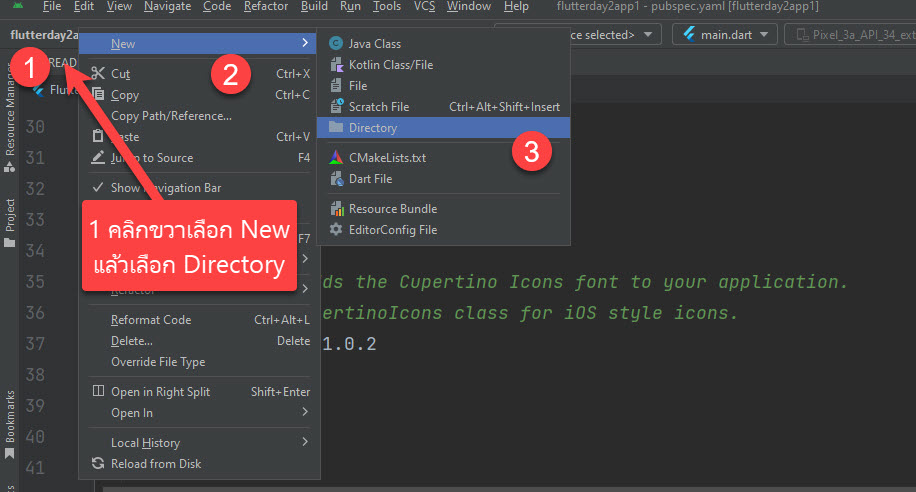
หลังจากนั้นจะต้องสร้าง Folder images โดยการ

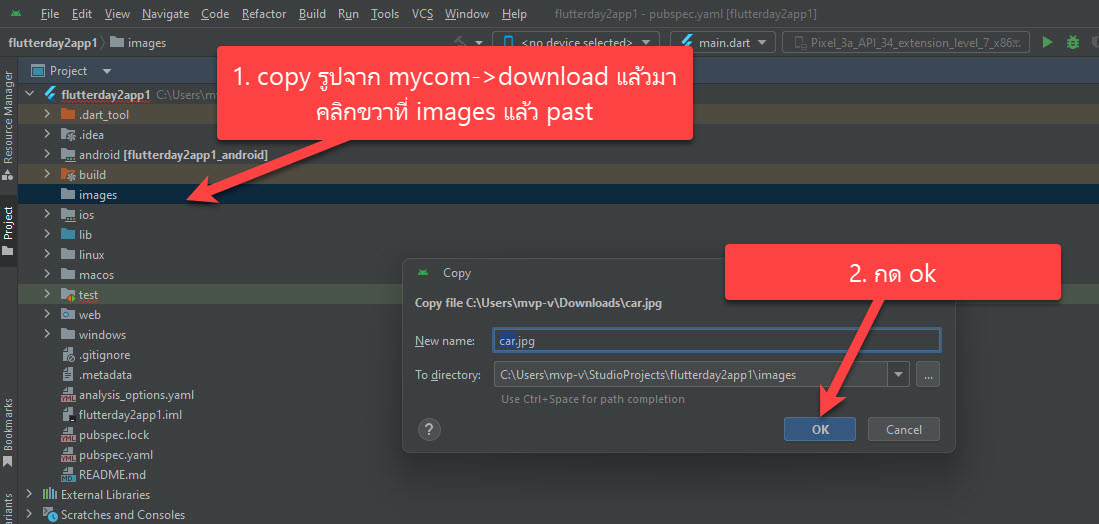
หลังจากนั้นให้หารูปจาก google download หรือ save ไว้ใน download ของ pc เรา แล้วให้ copy ไปวางใน folder images ของ flutter project ตามภาพ
การใช้งานกลับไปแก้ไขตรง Image โดยใส่ debugShowCheckedModeBanner:false ,
import 'package:flutter/material.dart';
void main(){
  runApp(
    MaterialApp(
      home:Scaffold(
        appBar: AppBar(
          title: const Text('AppBar 222222'),
          backgroundColor: Colors.deepOrange[100],
        ),
        body:const Image(
            image: AssetImage('images/car.jpg'),
        ),
      ) ,
    )
  );
}
ลบ debuging บน app ออก
import 'package:flutter/material.dart';
void main(){
  runApp(
    MaterialApp(
      debugShowCheckedModeBanner:false ,
      home:Scaffold(
        appBar: AppBar(
          title: const Text('AppBar 222222'),
          backgroundColor: Colors.deepOrange[100],
        ),
        body:const Image(
            image: AssetImage('images/car.jpg'),

        ),
      ) ,
    )
  );
}
การใช้ Row โดยใช้ icon เรียงกันใน Row
import 'package:flutter/material.dart';
void main(){
  runApp(
    MaterialApp(
      debugShowCheckedModeBanner:false ,
      home:Scaffold(
        appBar: AppBar(
          title: const Text('AppBar 222222'),
          backgroundColor: Colors.deepOrange[100],
        ),
        body: Row(
          children: <Widget>[
            Icon(Icons.motorcycle),
            Icon(Icons.motorcycle),
            Icon(Icons.motorcycle)
            ],
          )
        ),
      ) ,

  );
}
ปรับให้ไอคอนอยู๋ตรงกลาง ในส่วนการแสดงผลแบบ Row
import 'package:flutter/material.dart';
void main(){
  runApp(
    MaterialApp(
      debugShowCheckedModeBanner:false ,
      home:Scaffold(
        appBar: AppBar(
          title: const Text('AppBar 222222'),
          backgroundColor: Colors.deepOrange[100],
        ),
        body: Row(
          mainAxisAlignment: MainAxisAlignment.center,
          children: <Widget>[
            Icon(Icons.motorcycle),
            Icon(Icons.motorcycle),
            Icon(Icons.motorcycle)
            ],
          )
        ),
      ) ,

  );
}
ถ้าจะเรียงรูปไอคอนแบบในภาพ
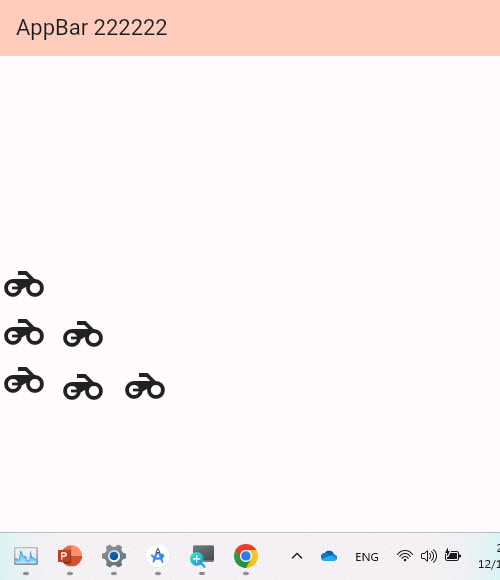
สามารถใส่โค้ดได้ดังนี้
import 'package:flutter/material.dart';
void main(){
  runApp(
    MaterialApp(
      debugShowCheckedModeBanner:false ,
      home:Scaffold(
        appBar: AppBar(
          title: const Text('AppBar 222222'),
          backgroundColor: Colors.deepOrange[100],
        ),
        body: Column(
          mainAxisAlignment: MainAxisAlignment.start,
          children: <Widget>[
            Row(
              children: <Widget>[Icon(Icons.motorcycle,size:48),],
            ),
           Row(
             children: <Widget>[
             Icon(Icons.motorcycle,size:48),
             Icon(Icons.motorcycle,size:48),
           ],),
            Row(
              children: <Widget>[
                Icon(Icons.motorcycle,size:48),
                Icon(Icons.motorcycle,size:48),
                Icon(Icons.motorcycle,size:48),],
            ),
            ],
          )
        ),
      ) ,

  );
}
แสดงผลตามรูปภาพด้านล่าง

สามารถใช้ Row และ Column ได้ดังนี้
import 'package:flutter/material.dart';
void main(){
  runApp(
    MaterialApp(
      debugShowCheckedModeBanner:false ,
      home:Scaffold(
        appBar: AppBar(
          title: const Text('AppBar 222222'),
          backgroundColor: Colors.deepOrange[100],
        ),
        body: Container(
              child:Column(
                children: <Widget>[
                  Row(children: <Widget>[Text('Actor 1')]),
                  Row(children: <Widget>[Text('Name '),Text(' Address'),])
                ],
              ) ,
          ),
        ),
      ) ,

  );
}