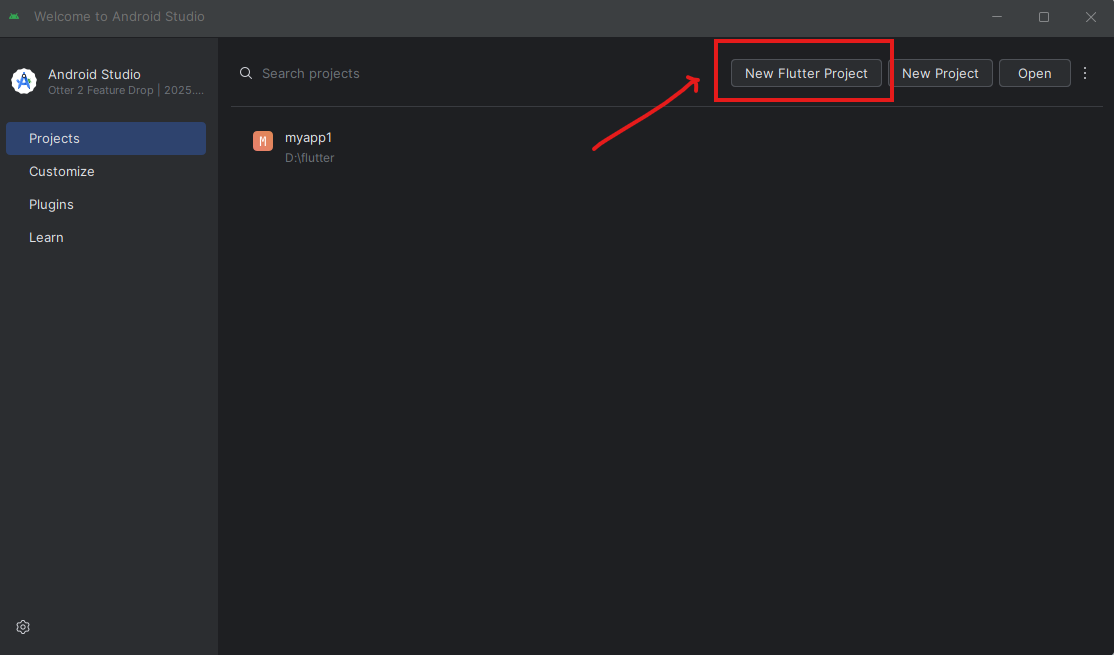
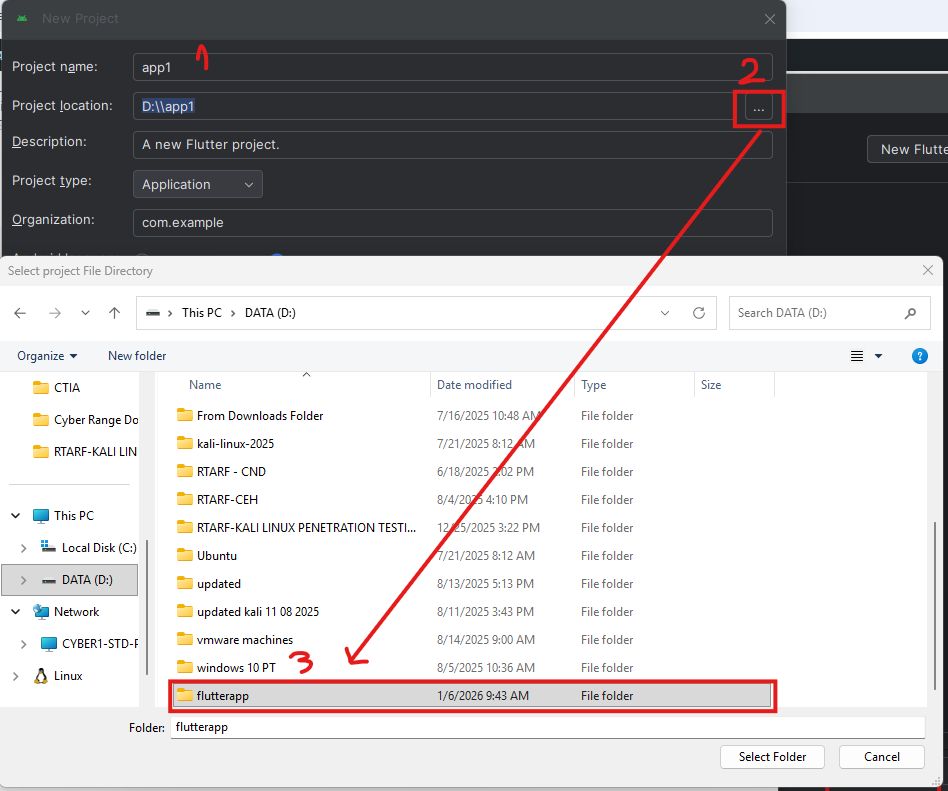
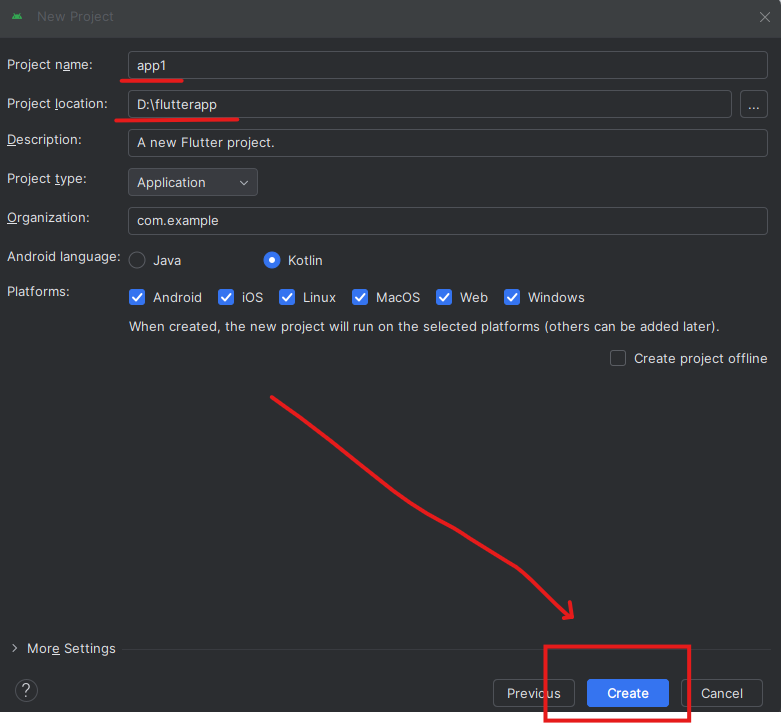
- เปิด Android Studio กดปุ่ม new project (กรณีหาปุ่มไม่เจอให้กลับมาหน้าแรก โดยเลือก menu file แล้ว close project ก่อน)
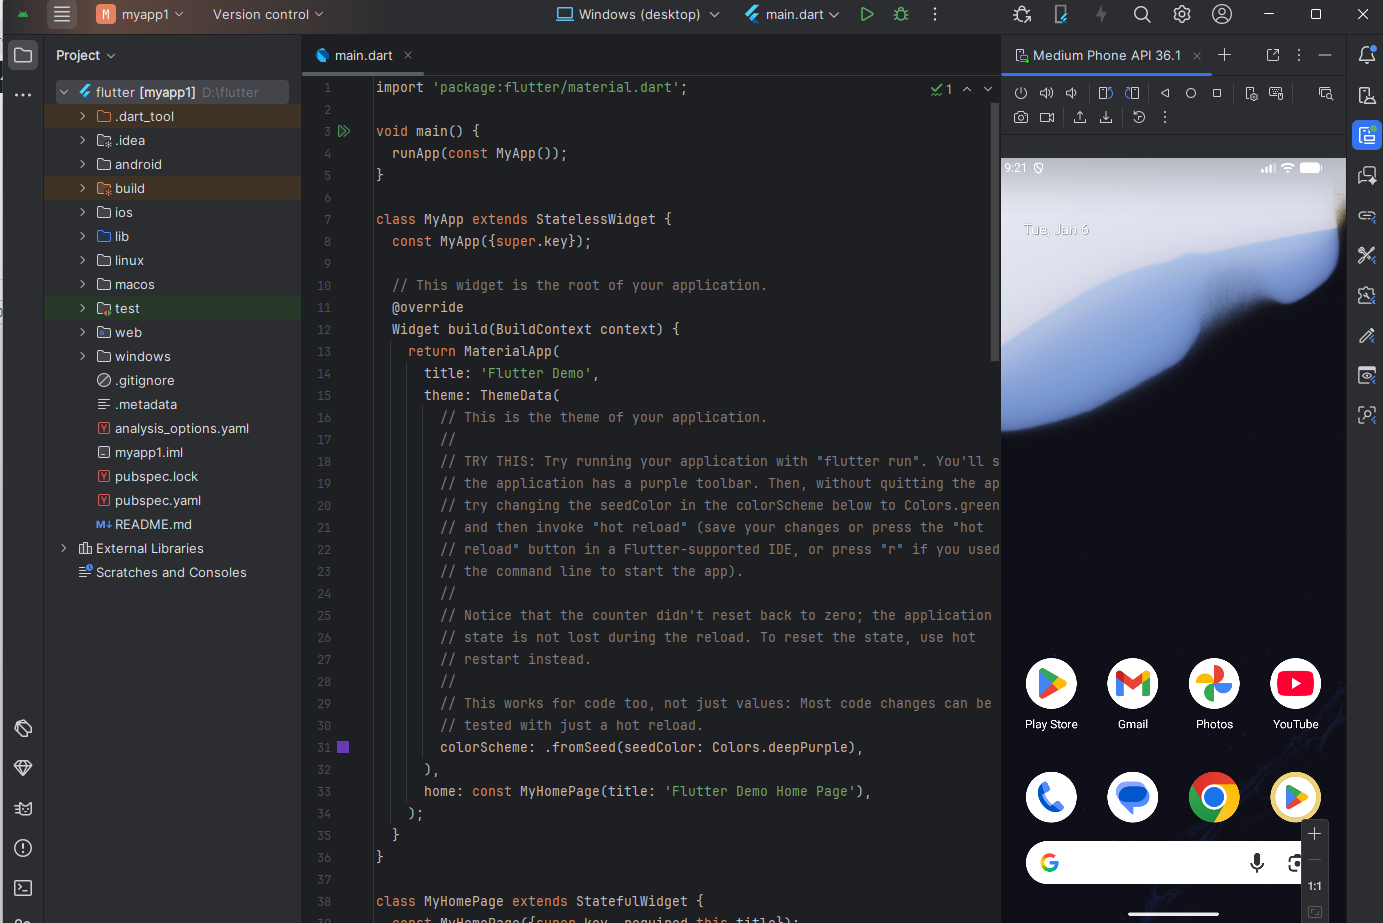
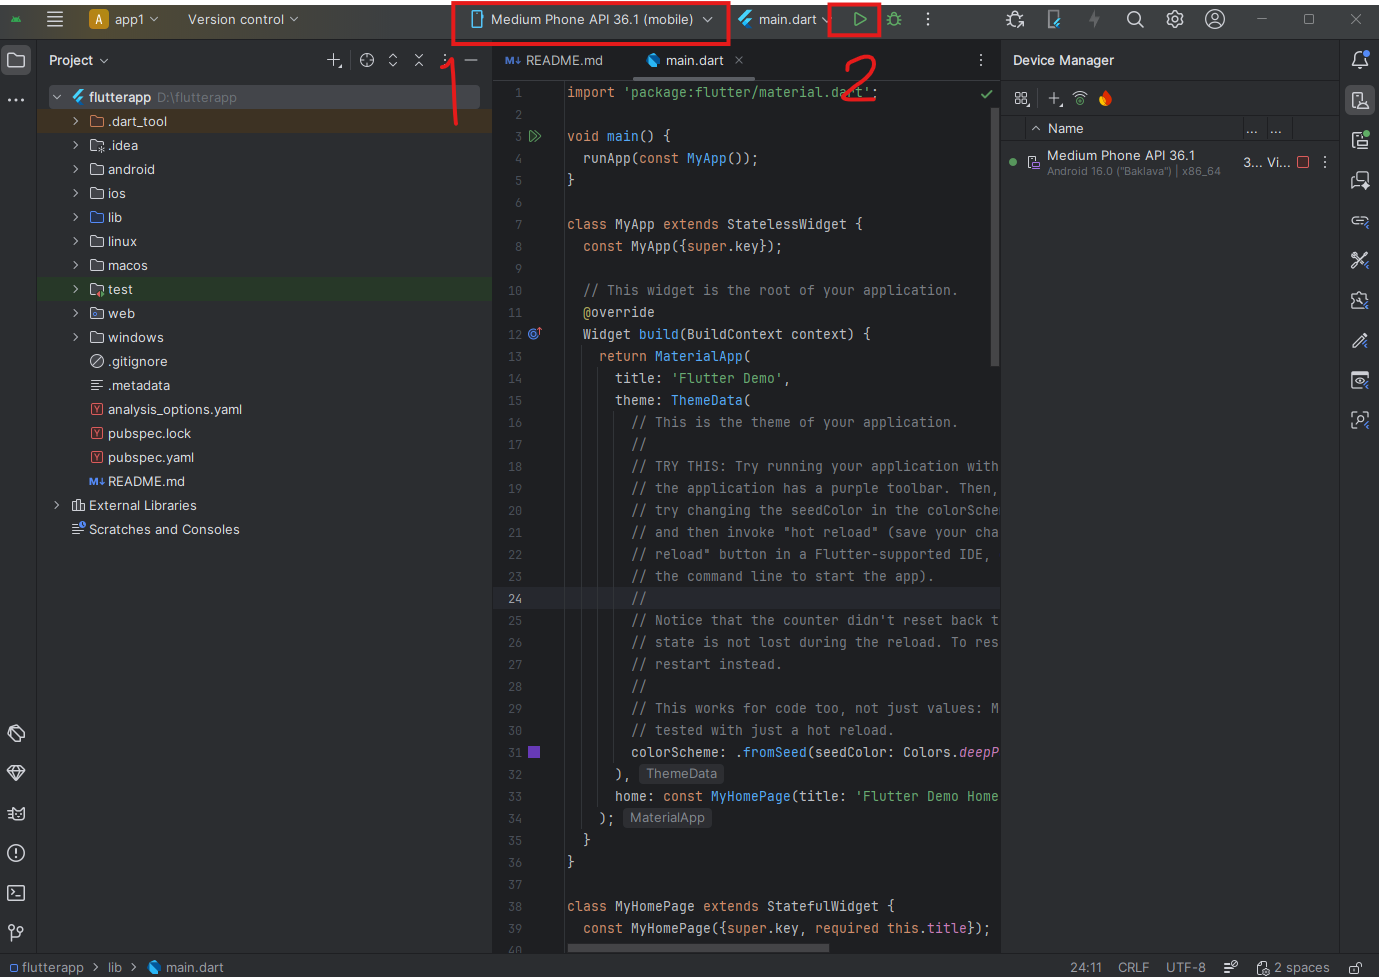
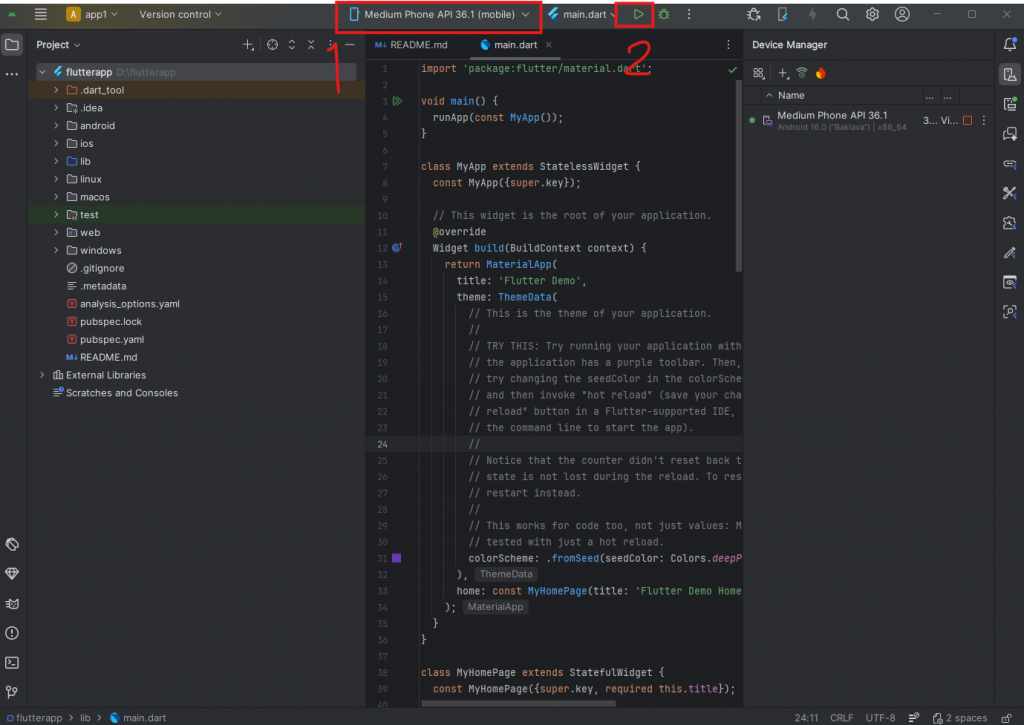
- เมื่อสร้าง app flutter แล้วให้ลองกดแสดงผล
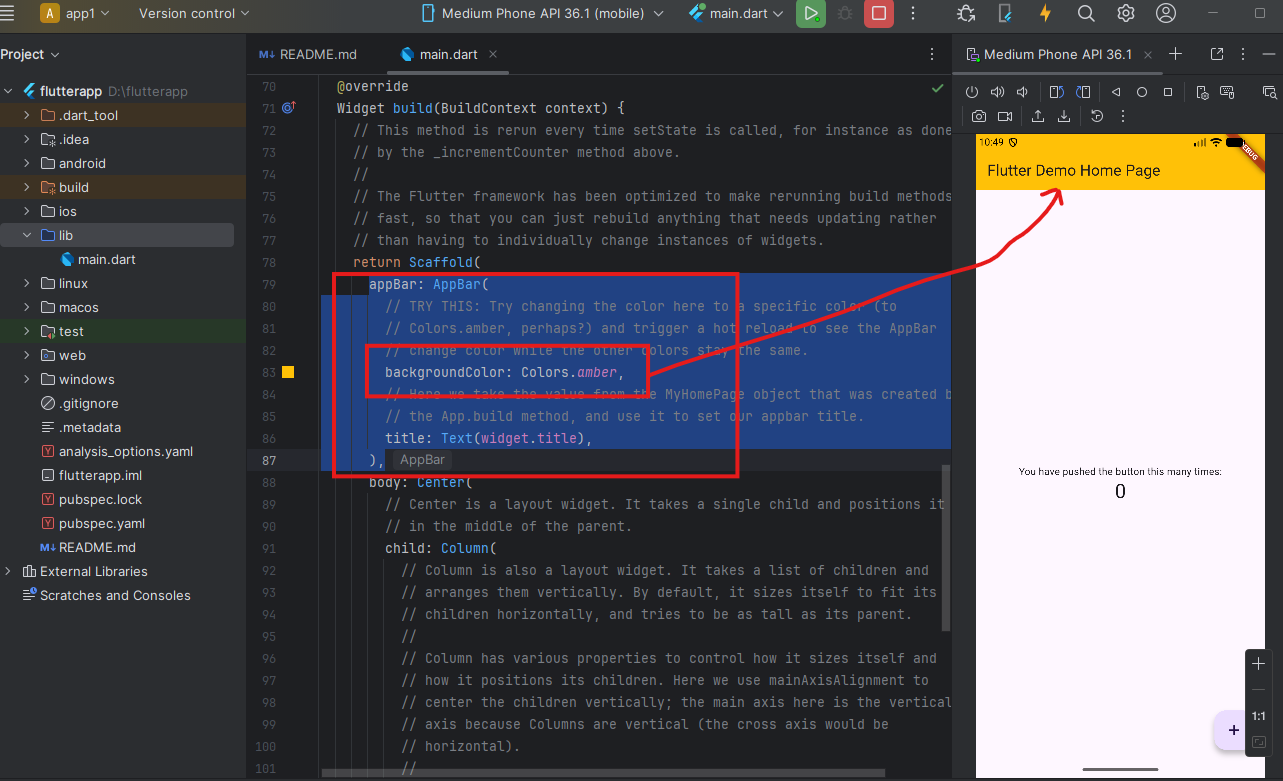
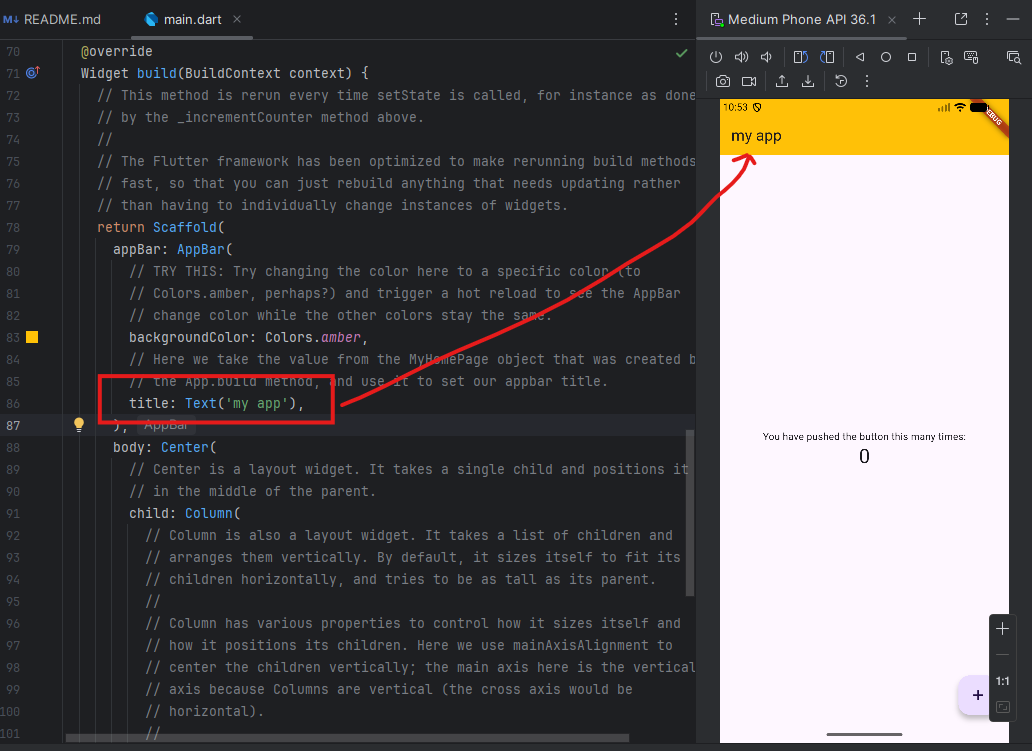
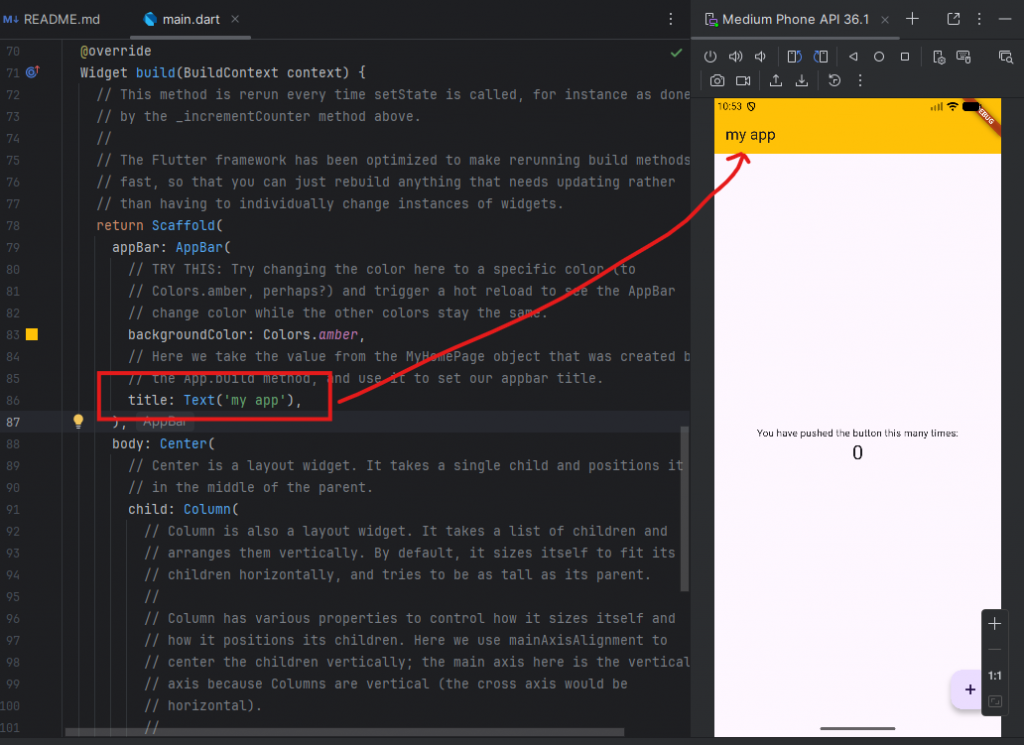
- ลองแก้ไข app bar
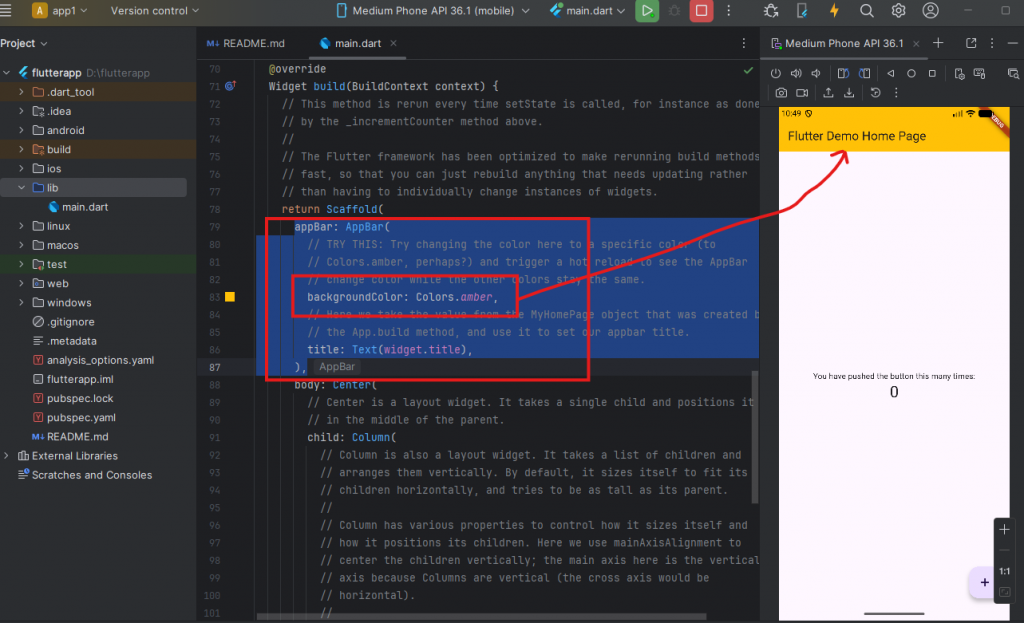
- แก้ไขชื่อ title ใน app bar
- ทดสอบแก้ไขโค้ดดังภาพ
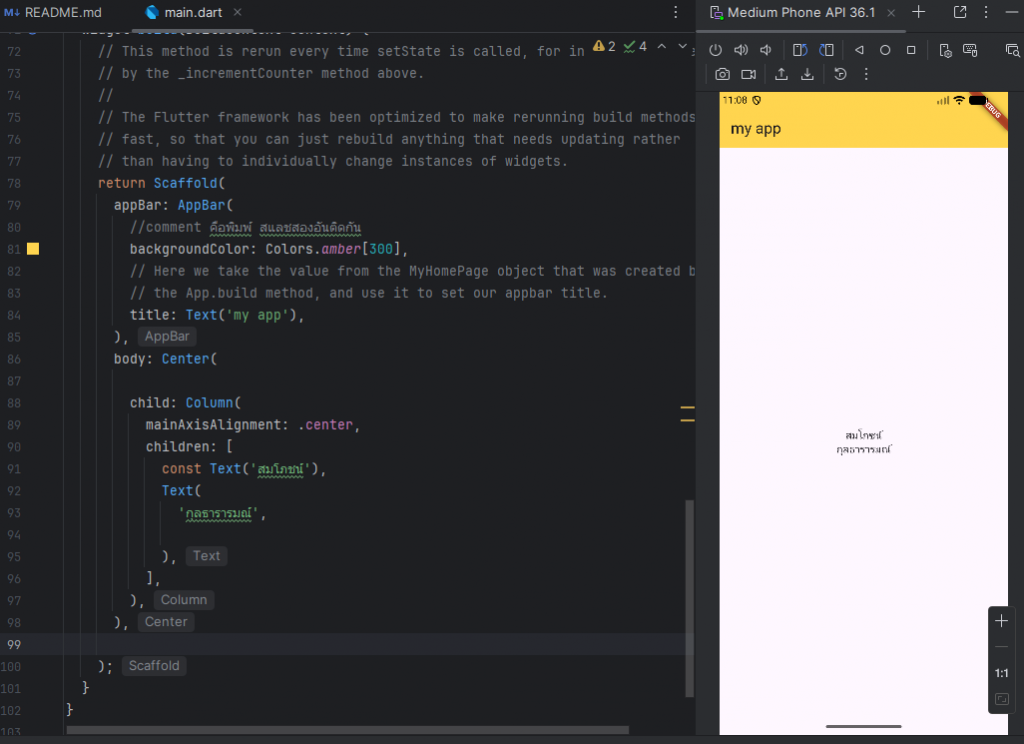
import 'package:flutter/material.dart'; void main() { runApp(const MyApp()); } class MyApp extends StatelessWidget { const MyApp({super.key}); // This widget is the root of your application. @override Widget build(BuildContext context) { return MaterialApp( title: 'Flutter Demo', theme: ThemeData( // This is the theme of your application. // // TRY THIS: Try running your application with "flutter run". You'll see // the application has a purple toolbar. Then, without quitting the app, // try changing the seedColor in the colorScheme below to Colors.green // and then invoke "hot reload" (save your changes or press the "hot // reload" button in a Flutter-supported IDE, or press "r" if you used // the command line to start the app). // // Notice that the counter didn't reset back to zero; the application // state is not lost during the reload. To reset the state, use hot // restart instead. // // This works for code too, not just values: Most code changes can be // tested with just a hot reload. colorScheme: .fromSeed(seedColor: Colors.deepPurple), ), home: const MyHomePage(title: 'Flutter Demo Home Page'), ); } } class MyHomePage extends StatefulWidget { const MyHomePage({super.key, required this.title}); // This widget is the home page of your application. It is stateful, meaning // that it has a State object (defined below) that contains fields that affect // how it looks. // This class is the configuration for the state. It holds the values (in this // case the title) provided by the parent (in this case the App widget) and // used by the build method of the State. Fields in a Widget subclass are // always marked "final". final String title; @override State<MyHomePage> createState() => _MyHomePageState(); } class _MyHomePageState extends State<MyHomePage> { int _counter = 0; void _incrementCounter() { setState(() { // This call to setState tells the Flutter framework that something has // changed in this State, which causes it to rerun the build method below // so that the display can reflect the updated values. If we changed // _counter without calling setState(), then the build method would not be // called again, and so nothing would appear to happen. _counter++;//+1 +1 }); } @override Widget build(BuildContext context) { // This method is rerun every time setState is called, for instance as done // by the _incrementCounter method above. // // The Flutter framework has been optimized to make rerunning build methods // fast, so that you can just rebuild anything that needs updating rather // than having to individually change instances of widgets. return Scaffold( appBar: AppBar( //comment คือพิมพ์ สแลชสองอันติดกัน backgroundColor: Colors.amber[300], // Here we take the value from the MyHomePage object that was created by // the App.build method, and use it to set our appbar title. title: Text('my app'), ), body: Center( child: Column( mainAxisAlignment: .center, children: [ const Text('สมโภชน์'), Text( 'กุลธารารมณ์', ), ], ), ), ); } } - ตัวอย่าง row และ column
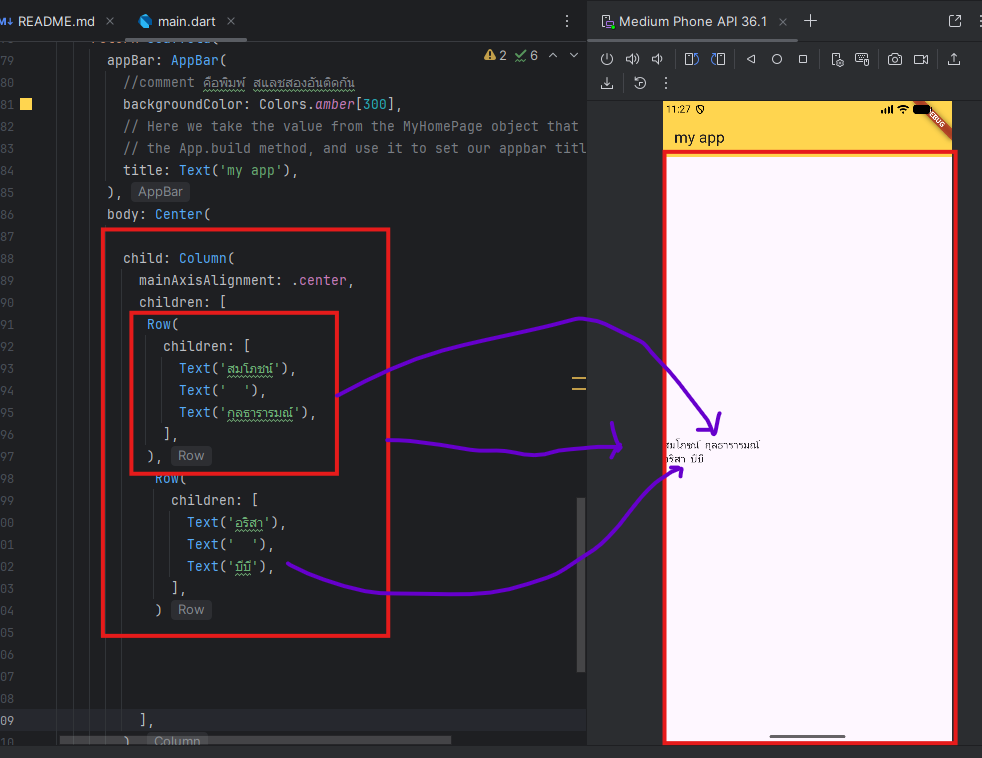
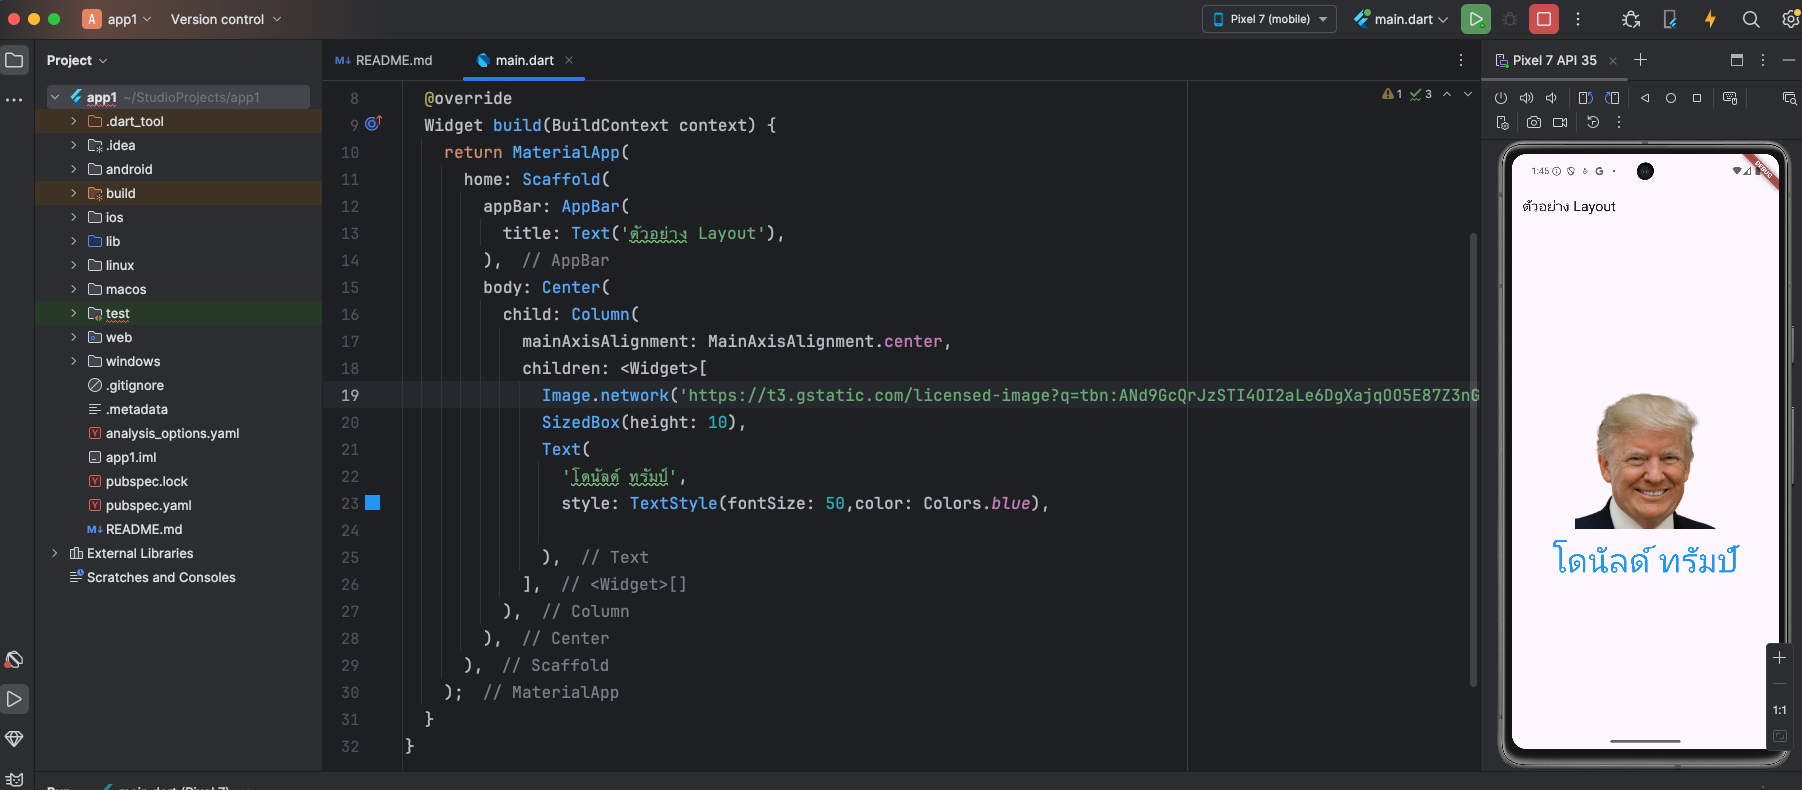
import 'package:flutter/material.dart'; void main() { runApp(const MyApp()); } class MyApp extends StatelessWidget { const MyApp({super.key}); // This widget is the root of your application. @override Widget build(BuildContext context) { return MaterialApp( title: 'Flutter Demo', theme: ThemeData( // This is the theme of your application. // // TRY THIS: Try running your application with "flutter run". You'll see // the application has a purple toolbar. Then, without quitting the app, // try changing the seedColor in the colorScheme below to Colors.green // and then invoke "hot reload" (save your changes or press the "hot // reload" button in a Flutter-supported IDE, or press "r" if you used // the command line to start the app). // // Notice that the counter didn't reset back to zero; the application // state is not lost during the reload. To reset the state, use hot // restart instead. // // This works for code too, not just values: Most code changes can be // tested with just a hot reload. colorScheme: .fromSeed(seedColor: Colors.deepPurple), ), home: const MyHomePage(title: 'Flutter Demo Home Page'), ); } } class MyHomePage extends StatefulWidget { const MyHomePage({super.key, required this.title}); // This widget is the home page of your application. It is stateful, meaning // that it has a State object (defined below) that contains fields that affect // how it looks. // This class is the configuration for the state. It holds the values (in this // case the title) provided by the parent (in this case the App widget) and // used by the build method of the State. Fields in a Widget subclass are // always marked "final". final String title; @override State<MyHomePage> createState() => _MyHomePageState(); } class _MyHomePageState extends State<MyHomePage> { int _counter = 0; void _incrementCounter() { setState(() { // This call to setState tells the Flutter framework that something has // changed in this State, which causes it to rerun the build method below // so that the display can reflect the updated values. If we changed // _counter without calling setState(), then the build method would not be // called again, and so nothing would appear to happen. _counter++;//+1 +1 }); } @override Widget build(BuildContext context) { // This method is rerun every time setState is called, for instance as done // by the _incrementCounter method above. // // The Flutter framework has been optimized to make rerunning build methods // fast, so that you can just rebuild anything that needs updating rather // than having to individually change instances of widgets. return Scaffold( appBar: AppBar( //comment คือพิมพ์ สแลชสองอันติดกัน backgroundColor: Colors.amber[300], // Here we take the value from the MyHomePage object that was created by // the App.build method, and use it to set our appbar title. title: Text('my app'), ), body: Center( child: Column( mainAxisAlignment: .center, children: [ Row( children: [ Text('สมโภชน์'), Text(' '), Text('กุลธารารมณ์'), ], ), Row( children: [ Text('อริสา'), Text(' '), Text('บีบี'), ], ) ], ), ), ); } } - การเอารูปจาก internet มาแสดงใน app ทำได้ดังนี้
import 'package:flutter/material.dart';

void main() {
  runApp(MyApp());
}

class MyApp extends StatelessWidget {
  @override
  Widget build(BuildContext context) {
    return MaterialApp(
      home: Scaffold(
        appBar: AppBar(
          title: Text('ตัวอย่าง Layout'),
        ),
        body: Center(
          child: Column(
            mainAxisAlignment: MainAxisAlignment.center,
            children: <Widget>[
              Image.network('https://t3.gstatic.com/licensed-image?q=tbn:ANd9GcQrJzSTI4OI2aLe6DgXajqOO5E87Z3nGiTCZcn_-Q9xqZ_CLtLNLeYib4xxZUSGZgzb'),
              SizedBox(height: 10),
              Text(
                'โดนัลด์ ทรัมป์',
                style: TextStyle(fontSize: 50,color: Colors.blue),

              ),
            ],
          ),
        ),
      ),
    );
  }
}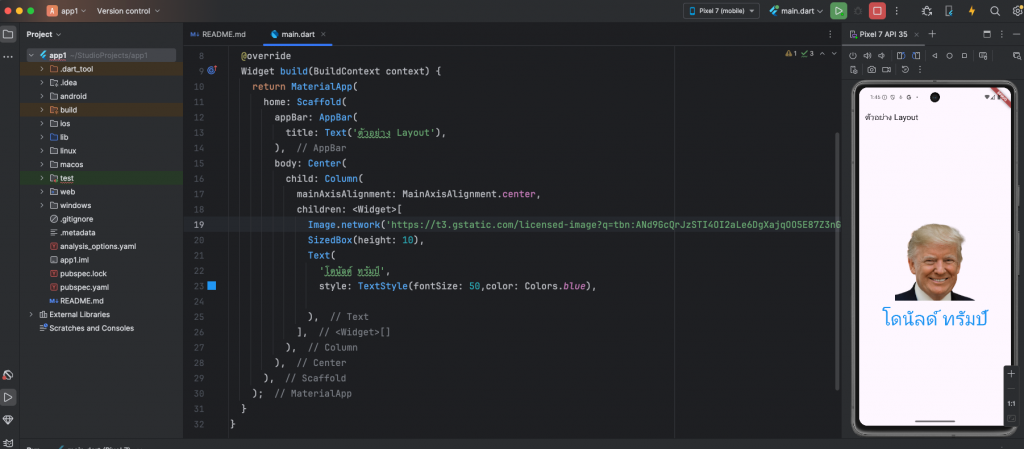
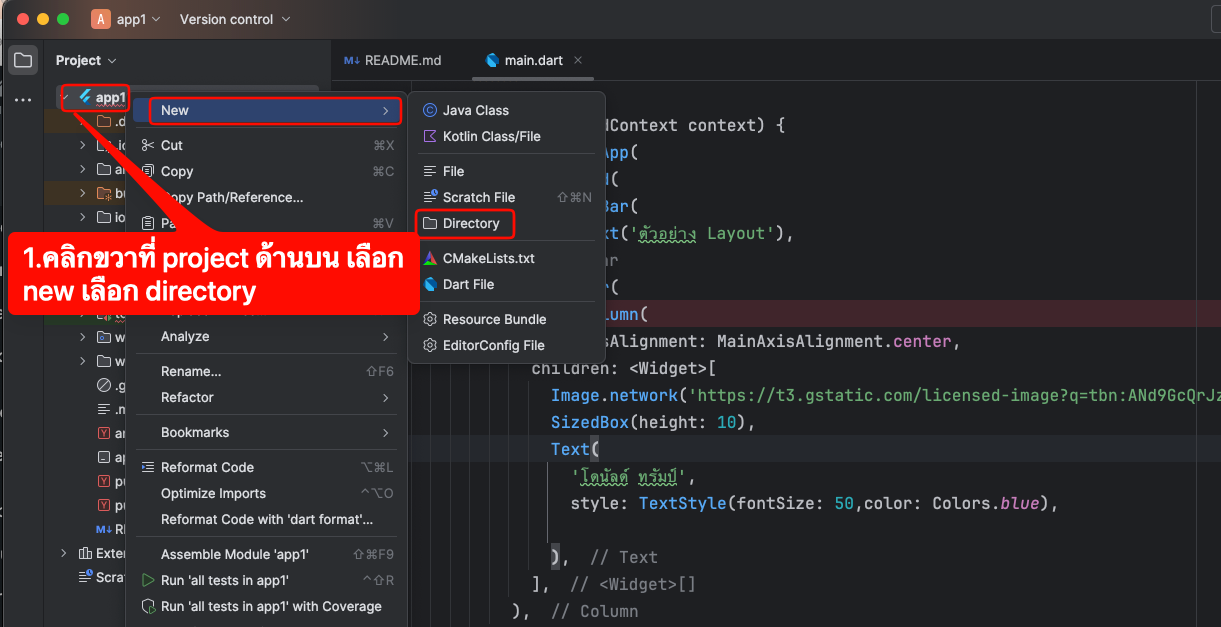
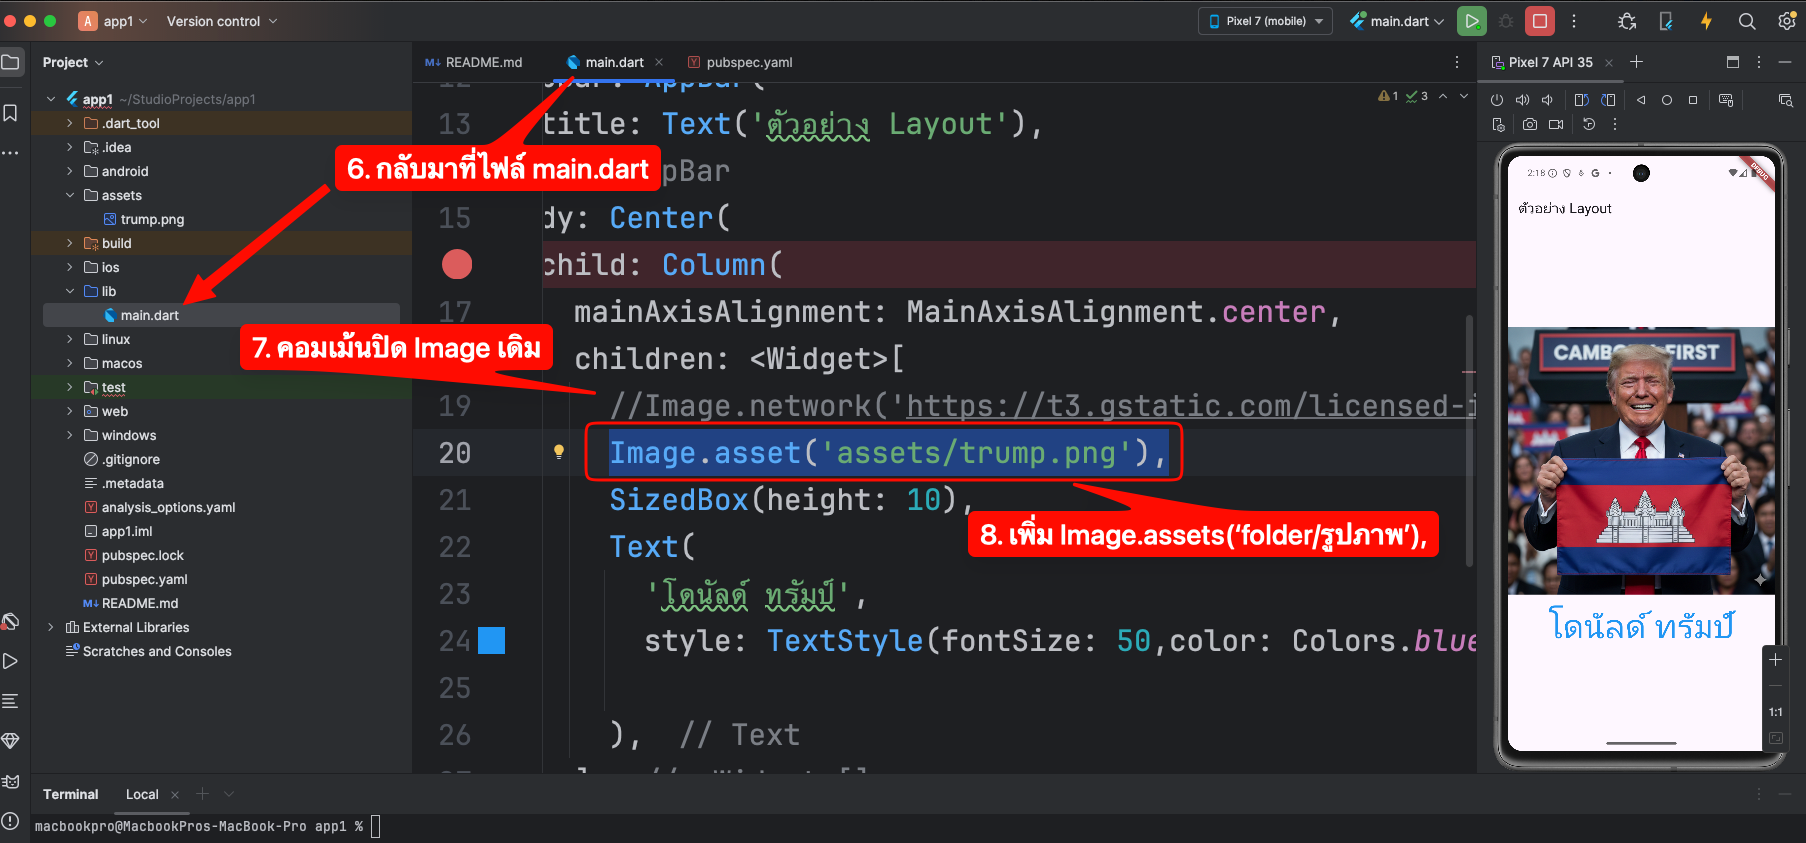
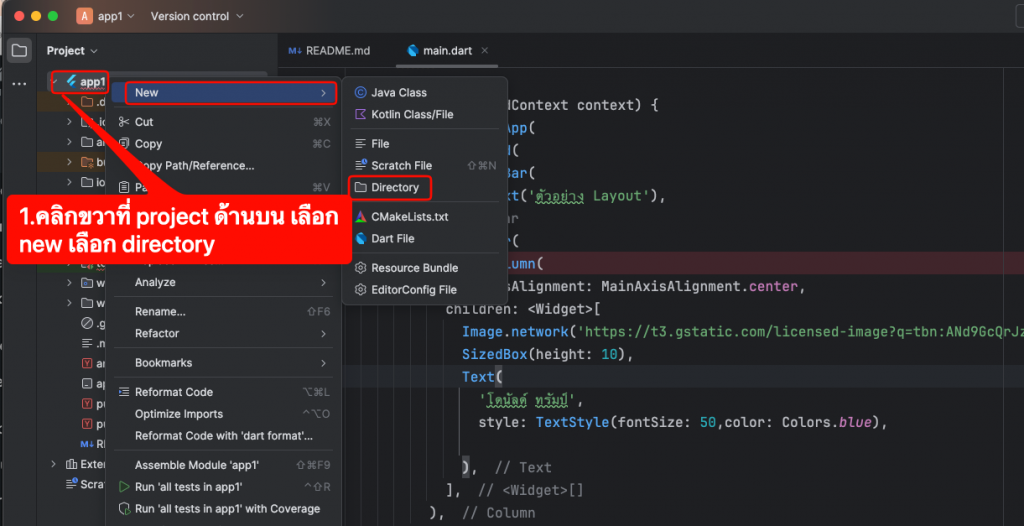
- การเอาภาพไว้ในแอพและเรียกใช้งาน
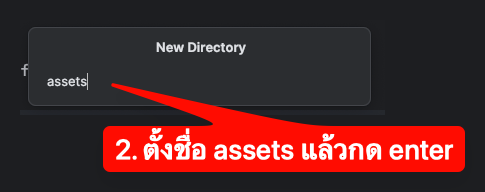
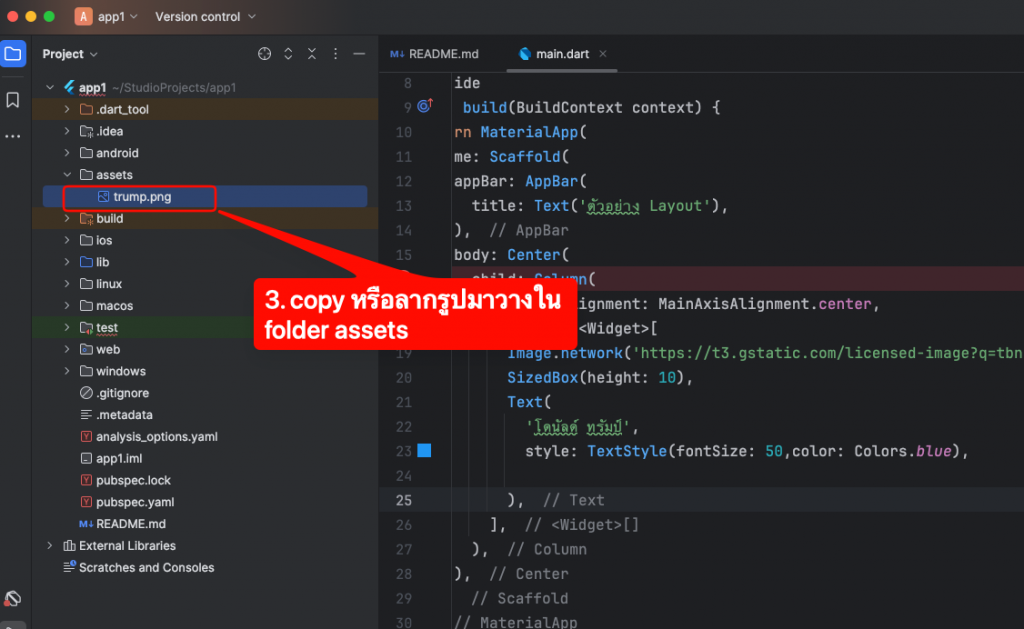
เริ่มจากไปสร้าง folder แล้วเอาไฟลภาพไปไว้ใน folder ที่สร้าง
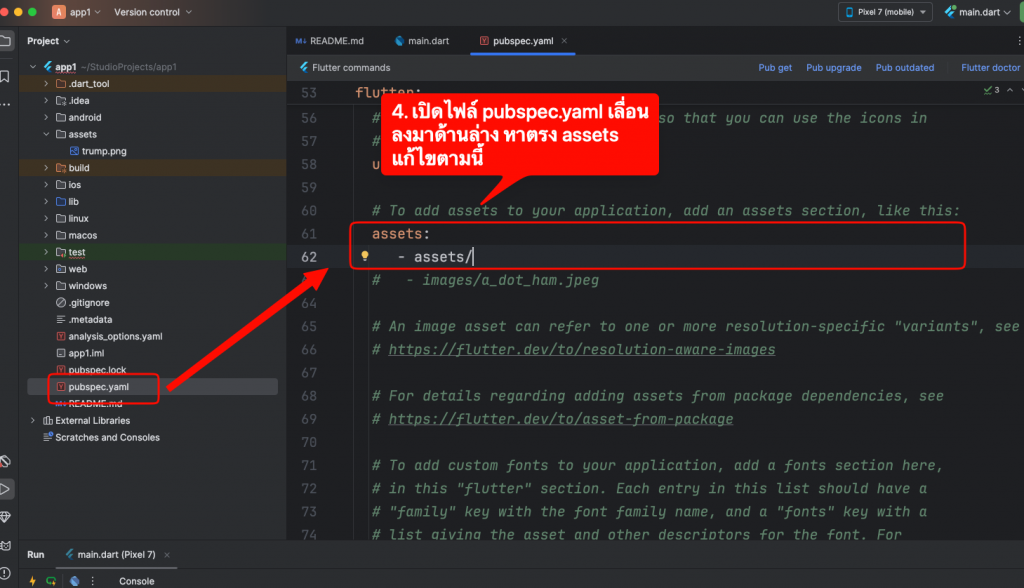
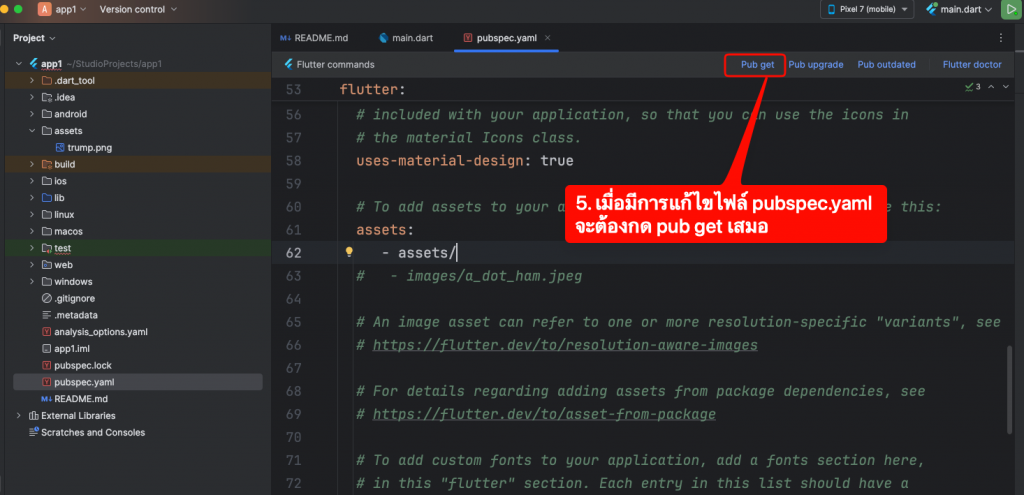
 ไปแก้ pubspec.yaml

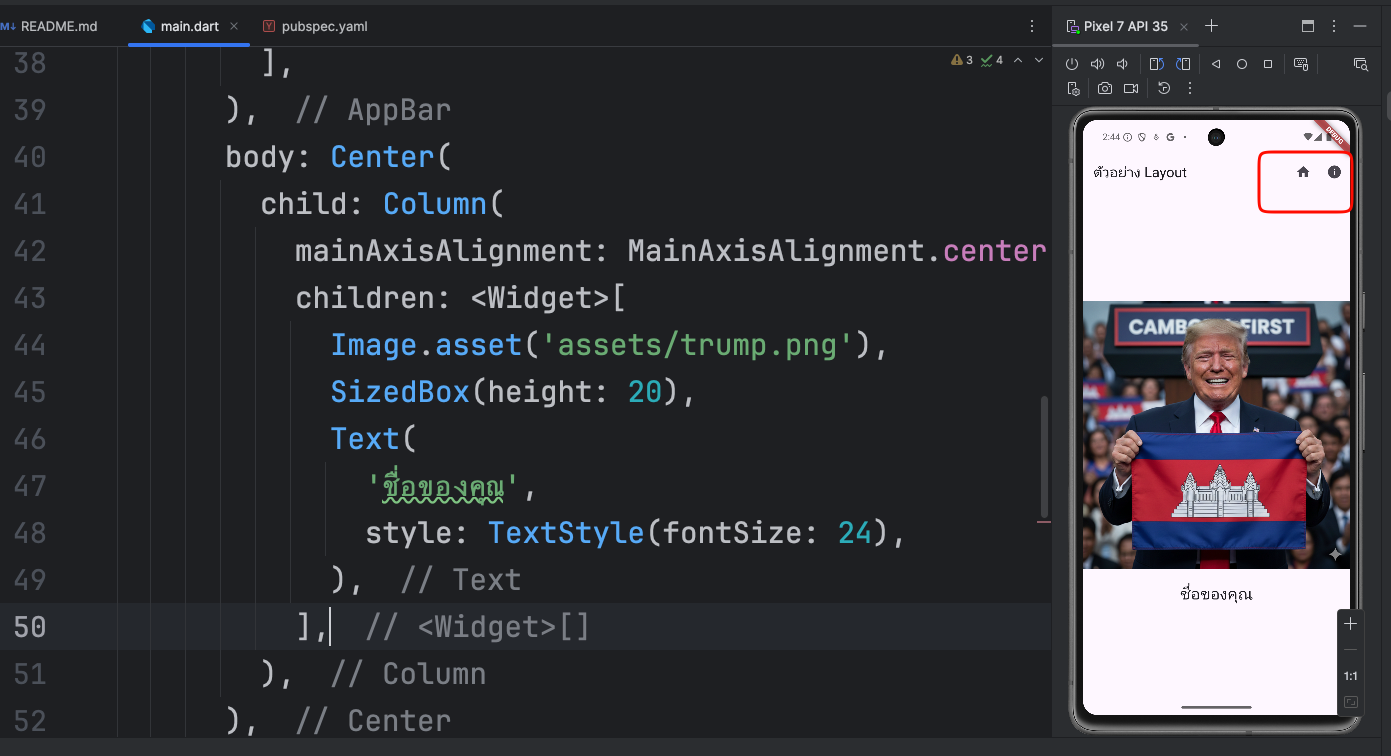
- สร้างปุ่ม home และ about us ใน app bar แล้วสร้าง page app bar ตามภาพ

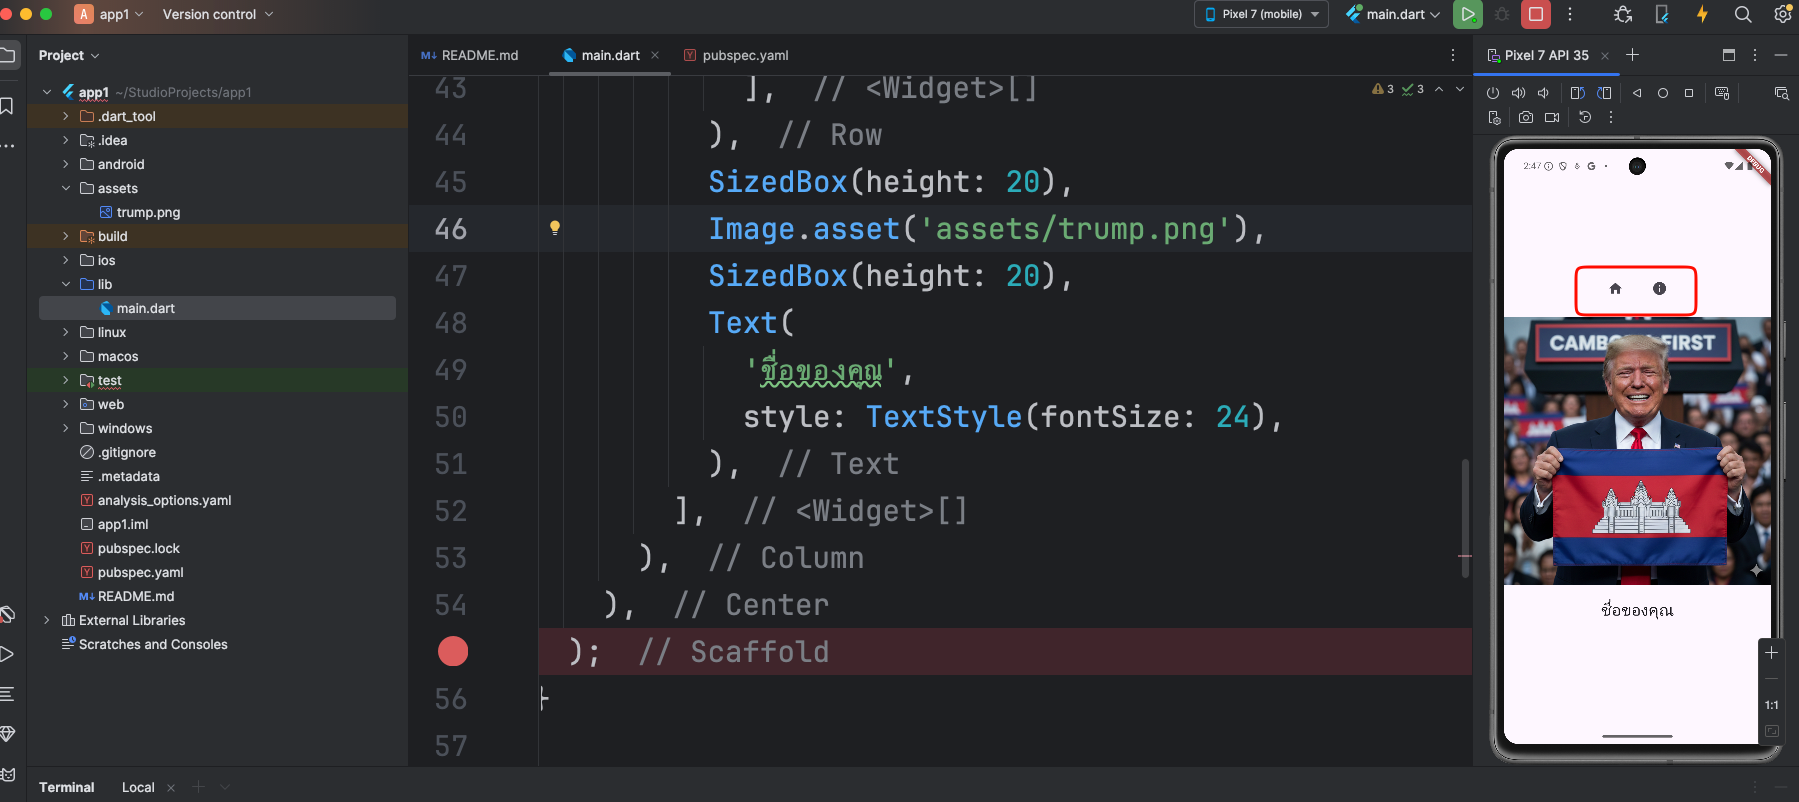
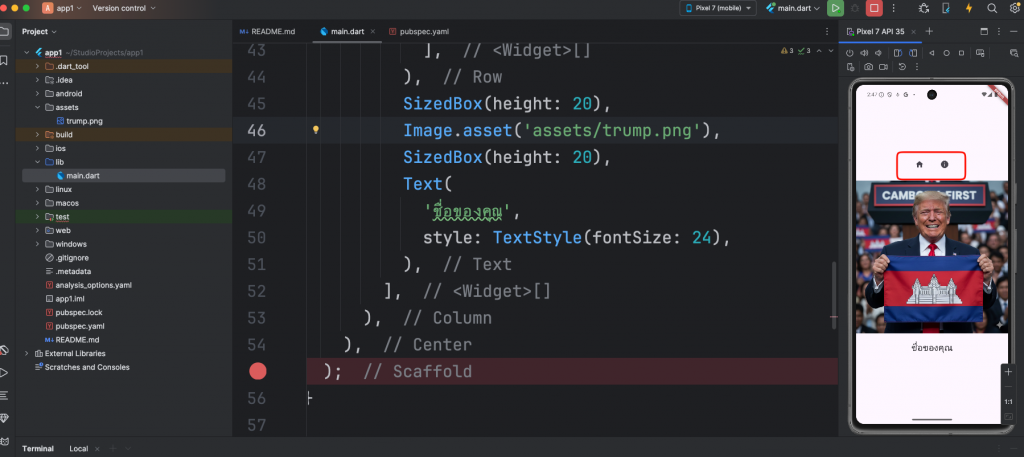
import 'package:flutter/material.dart'; void main() { runApp(MyApp()); } class MyApp extends StatelessWidget { @override Widget build(BuildContext context) { return MaterialApp( home: HomePage(), ); } } class HomePage extends StatelessWidget { @override Widget build(BuildContext context) { return Scaffold( appBar: AppBar( title: Text('ตัวอย่าง Layout'), actions: [ IconButton( icon: Icon(Icons.home), onPressed: () { // อยู่ในหน้าเดิมแล้ว ไม่ต้องทำอะไร }, ), IconButton( icon: Icon(Icons.info), onPressed: () { Navigator.push( context, MaterialPageRoute(builder: (context) => AboutPage()), ); }, ), ], ), body: Center( child: Column( mainAxisAlignment: MainAxisAlignment.center, children: <Widget>[ Image.asset('assets/trump.png'), SizedBox(height: 20), Text( 'ชื่อของคุณ', style: TextStyle(fontSize: 24), ), ], ), ), ); } } class AboutPage extends StatelessWidget { @override Widget build(BuildContext context) { return Scaffold( appBar: AppBar( title: Text('About Us'), ), body: Center( child: Text( 'นี่คือหน้าข้อมูลเกี่ยวกับแอปของเรา', style: TextStyle(fontSize: 20), ), ), ); } } - ย้าย ปุ่มมาใน body
import 'package:flutter/material.dart';

void main() {
  runApp(MyApp());
}

class MyApp extends StatelessWidget {
  @override
  Widget build(BuildContext context) {
    return MaterialApp(
      home: HomePage(),
    );
  }
}

class HomePage extends StatelessWidget {
  @override
  Widget build(BuildContext context) {
    return Scaffold(
      body: Center(
        child: Column(
          mainAxisAlignment: MainAxisAlignment.center,
          children: <Widget>[
            Row(
              mainAxisAlignment: MainAxisAlignment.center,
              children: <Widget>[
                IconButton(
                  icon: Icon(Icons.home),
                  onPressed: () {
                    // อยู่ในหน้าเดิมแล้ว ไม่ต้องทำอะไร
                  },
                ),
                SizedBox(width: 20),
                IconButton(
                  icon: Icon(Icons.info),
                  onPressed: () {
                    Navigator.push(
                      context,
                      MaterialPageRoute(builder: (context) => AboutPage()),
                    );
                  },
                ),
              ],
            ),
            SizedBox(height: 20),
            Image.asset('assets/image.jpg'),
            SizedBox(height: 20),
            Text(
              'ชื่อของคุณ',
              style: TextStyle(fontSize: 24),
            ),
          ],
        ),
      ),
    );
  }
}

class AboutPage extends StatelessWidget {
  @override
  Widget build(BuildContext context) {
    return Scaffold(
      appBar: AppBar(
        title: Text('About Us'),
      ),
      body: Center(
        child: Text(
          'นี่คือหน้าข้อมูลเกี่ยวกับแอปของเรา',
          style: TextStyle(fontSize: 20),
        ),
      ),
    );
  }
}