

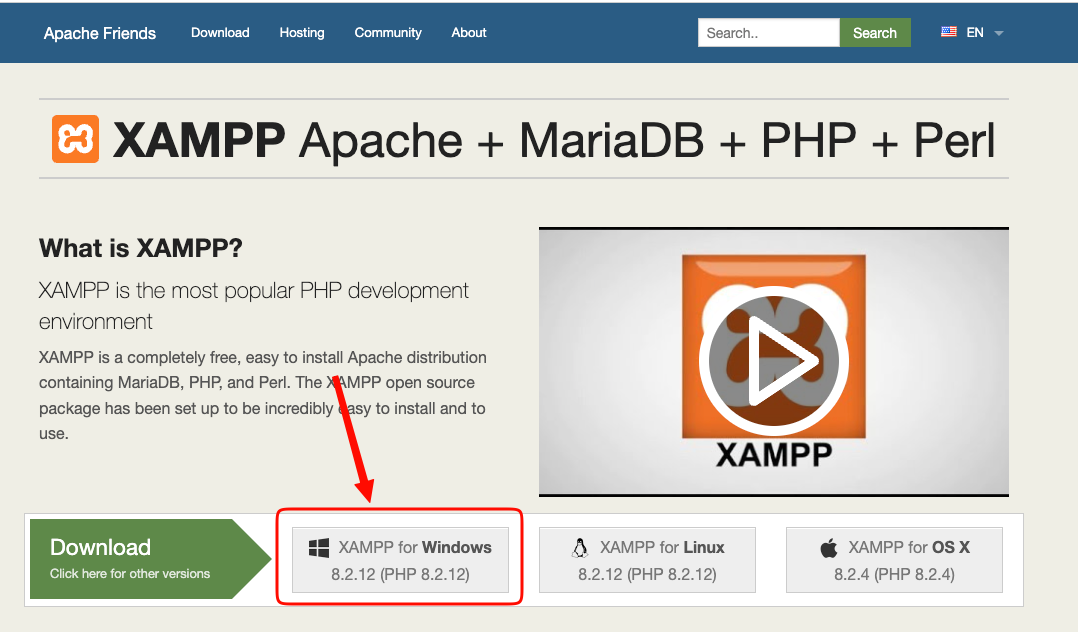
- ใช้ app จำลอง Web Server บนเครื่อง ให้ download xamp https://www.apachefriends.org/

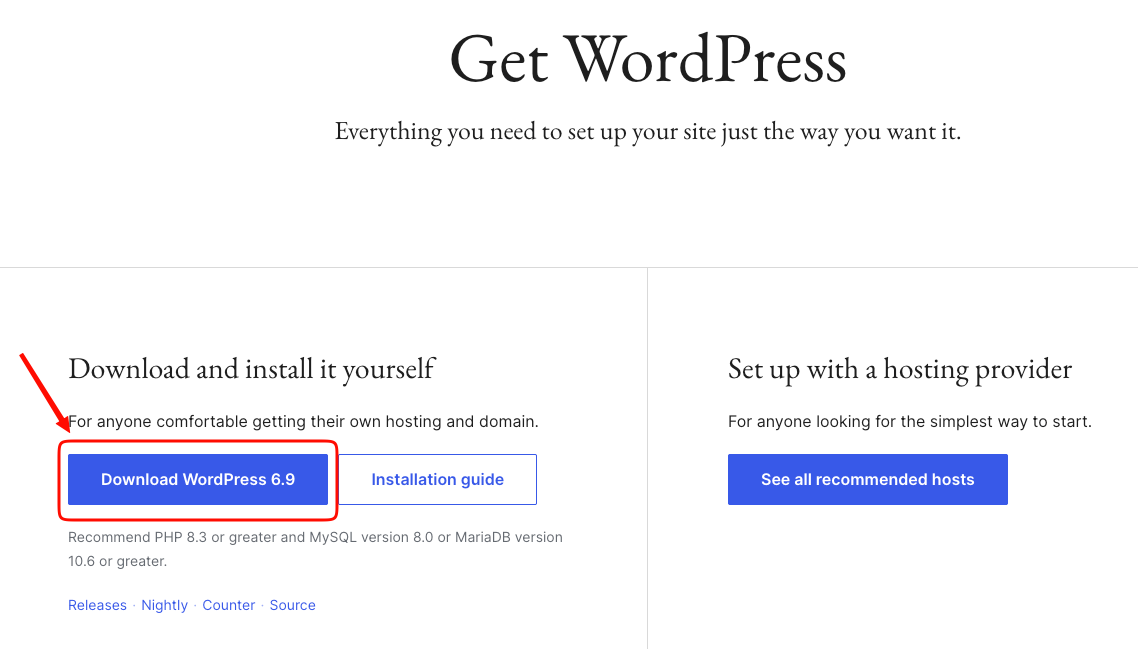
- download wordpress https://wordpress.org/download/

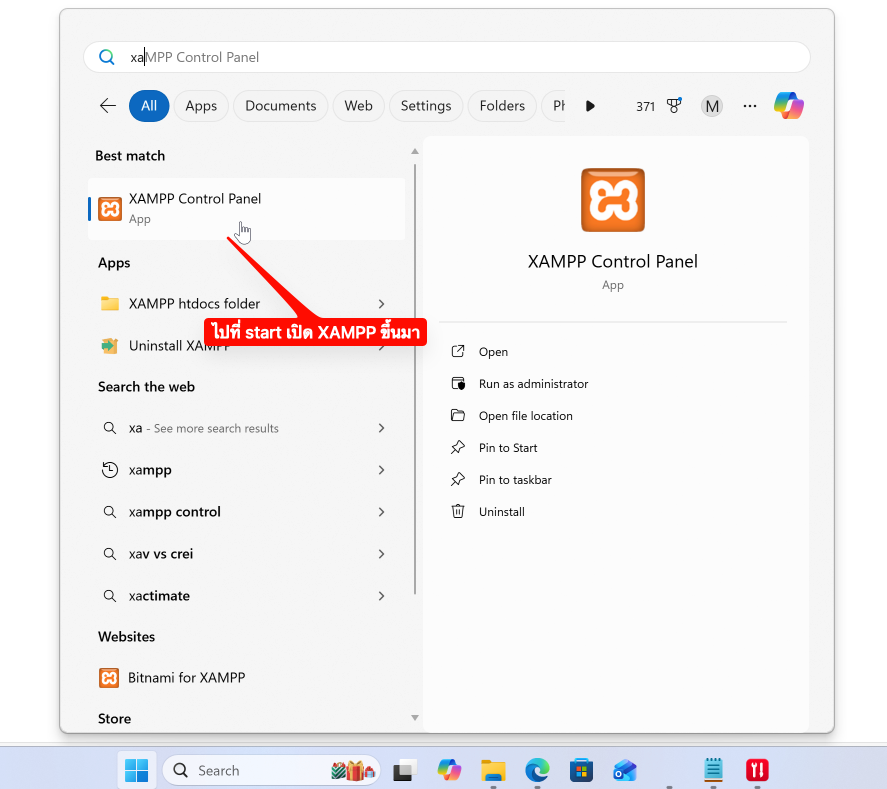
- ทำการ Install xampp กดดับเบิ้ลคลิกไฟล์ xampp ที่ download แล้ว install แล้วกด next ไปเรื่อย จนถึงหน้าที่ต้องเลือก Path เก็บ Folder : C:\xampp ถ้าไม่แก้ก็ใช้ตามนี้ หรือจะแก้เป็น C:\MyWeb ก็ได้ (เครื่องผู้สอนกลัวซ้ำเลยขอเปลี่ยนเป็น MyWeb) หลังจากนั้นกด next จน finish
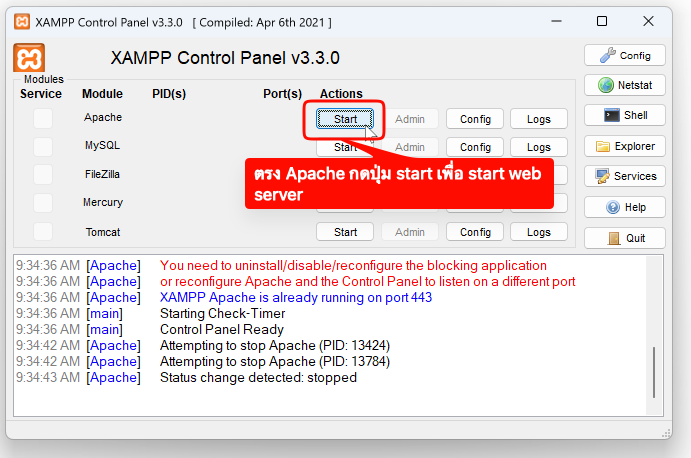
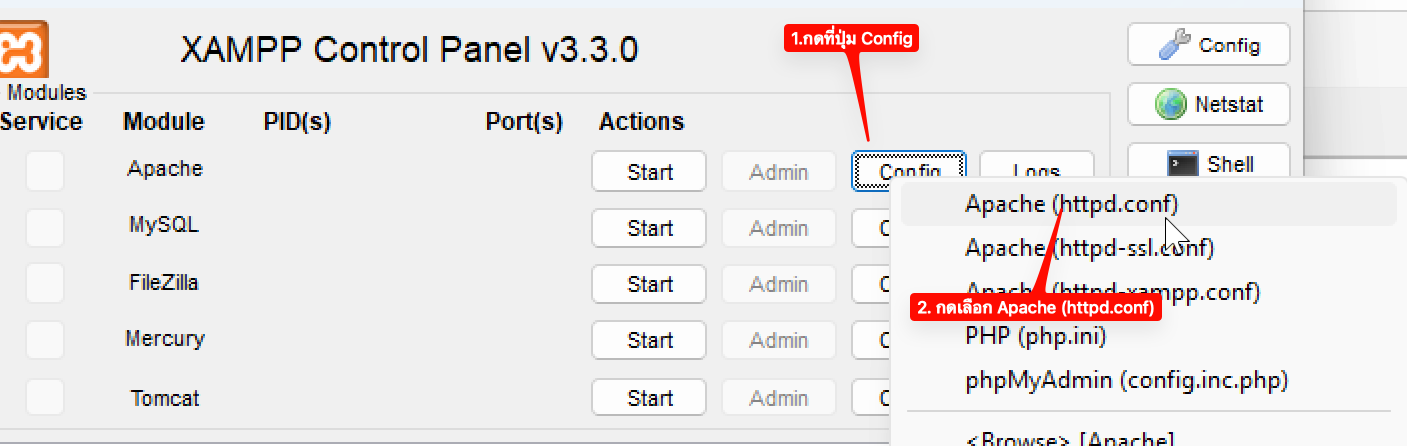
- กดปุ่ม start ตรง Apache เพื่อ run web server
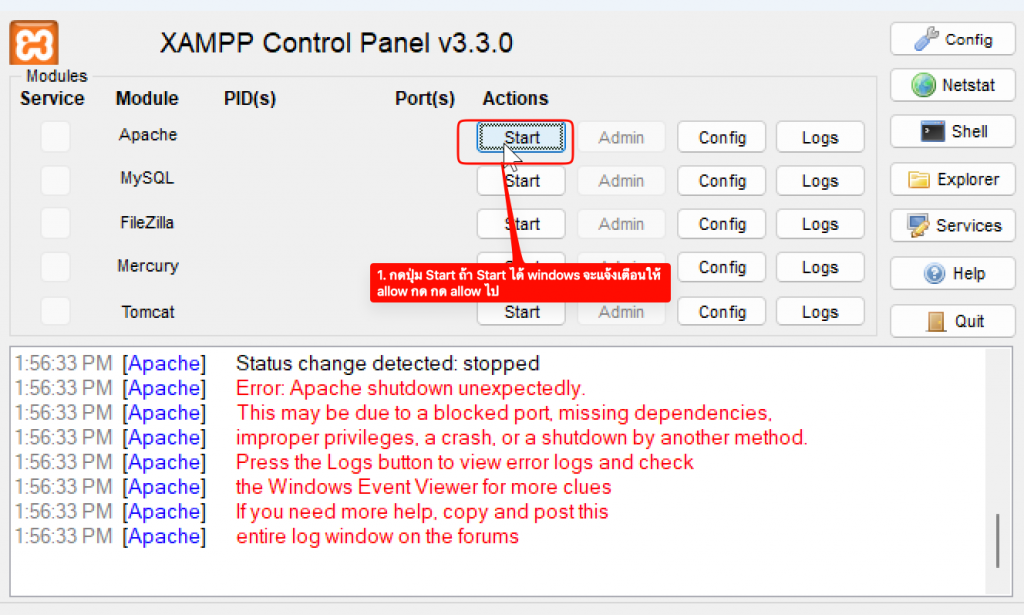
ถ้ากด start ไม่ได้ ให้แก้ตามนี้

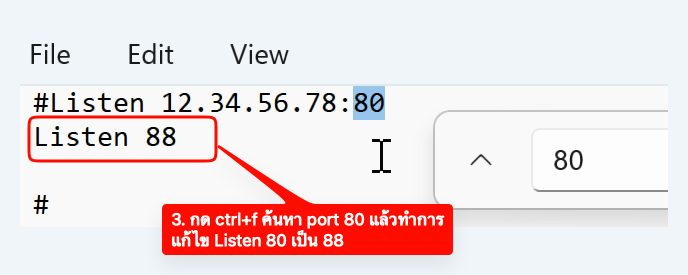
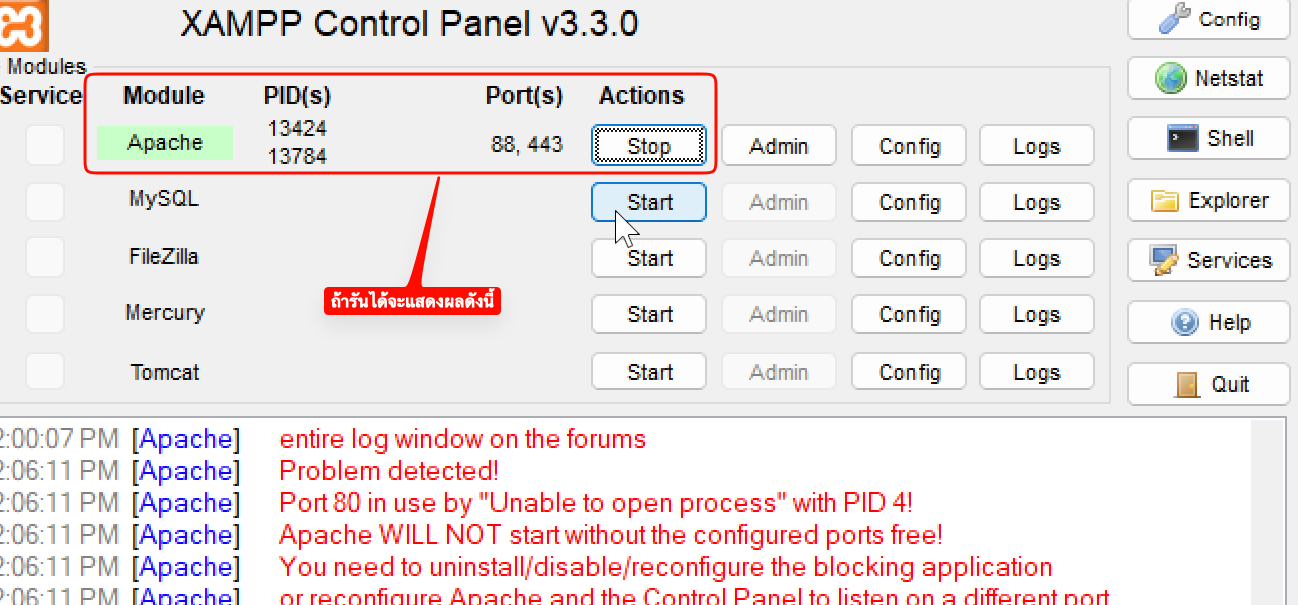
แล้วกดค้นหาอีกจะเจออีกที่ด้านล่างก็แก้ไขจาก 80 เป็น 88
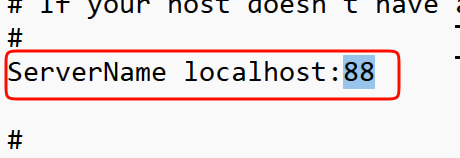
หลังจากนั้นกด ctrl+s เพื่อ Save ลองกดปุ่ม start อีกรอบ

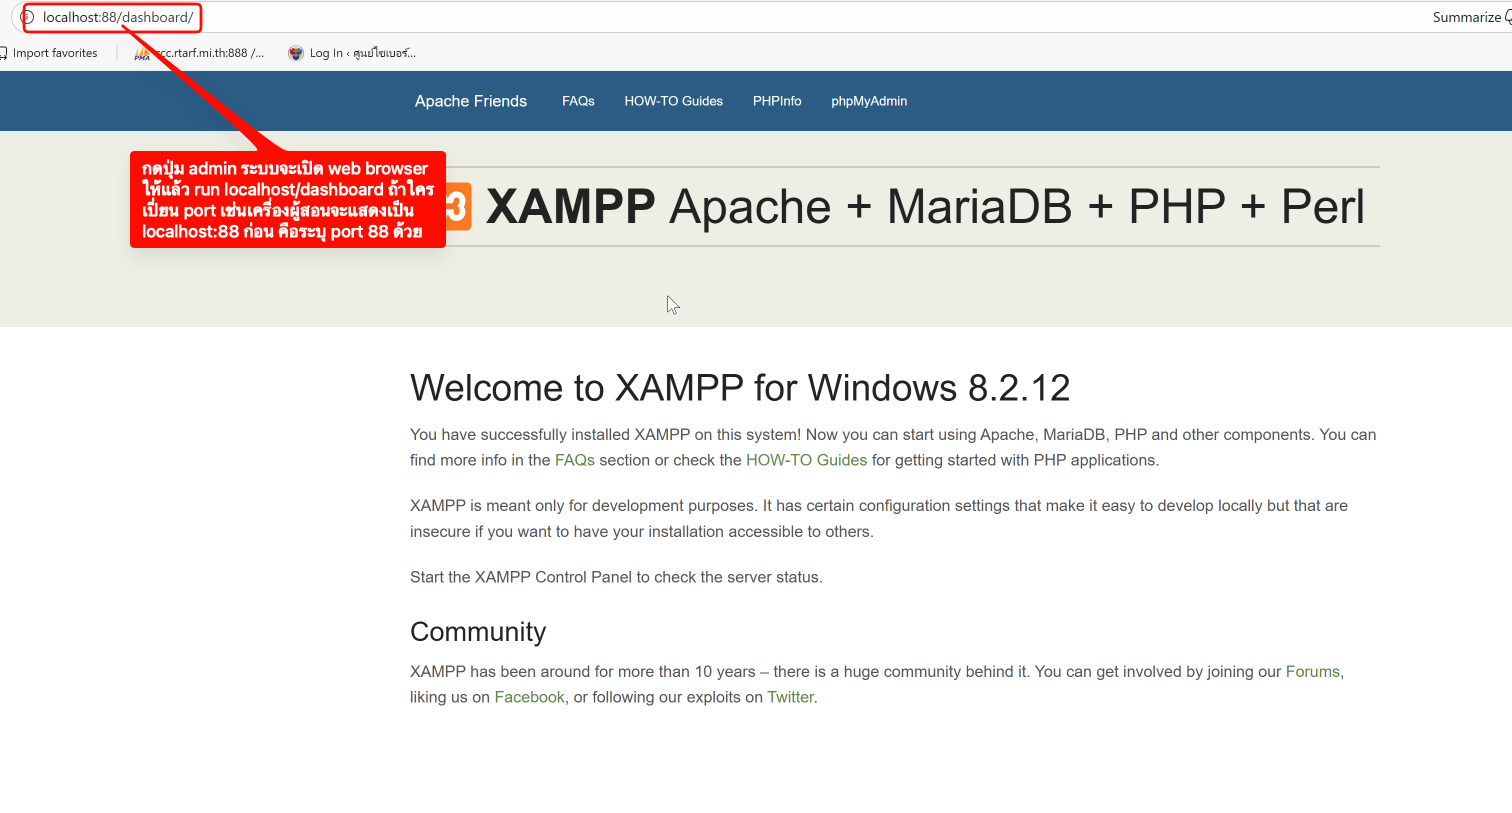
- เปิดเว็บ browser ขึ้นมาพิมพ์ localhost หรือกดปุ่ม admin ตรง apache จากภาพด้านบนระบบจะเปิดหน้าเว็บเซิฟเวอร์บนเครื่องเราให้ดังภาพ

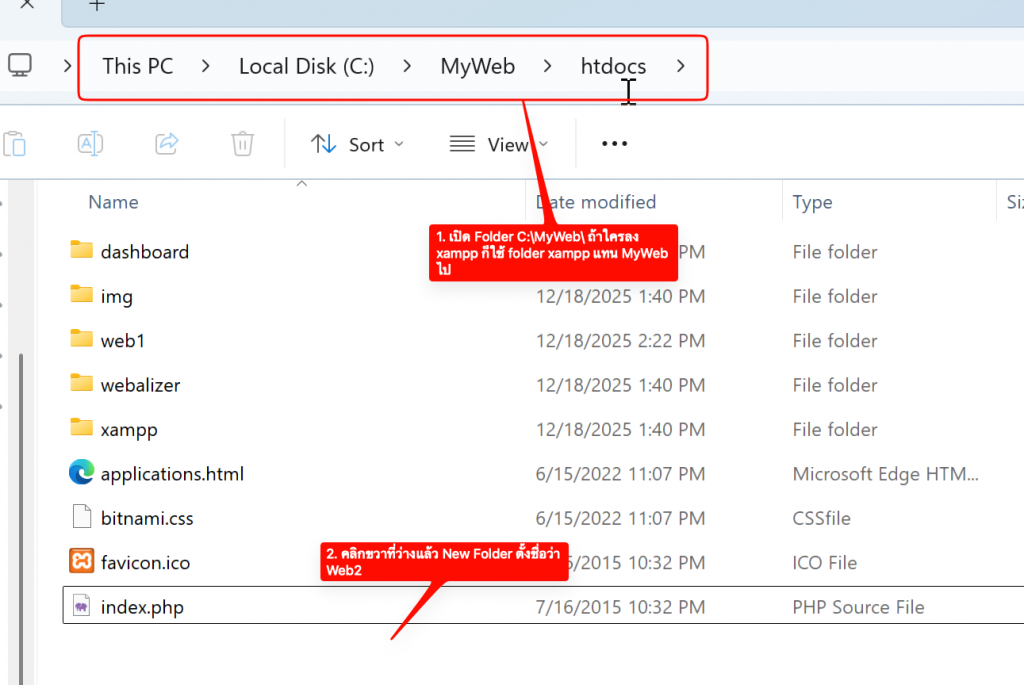
- สร้างไฟล์ web ของเรา โดยไปที่ xampp control ตามภาพ
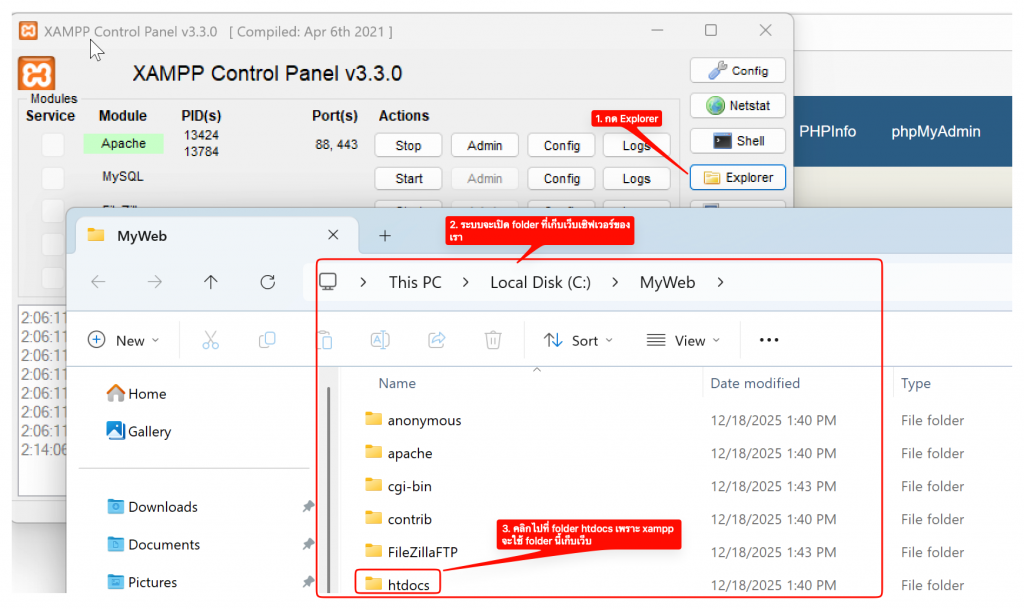
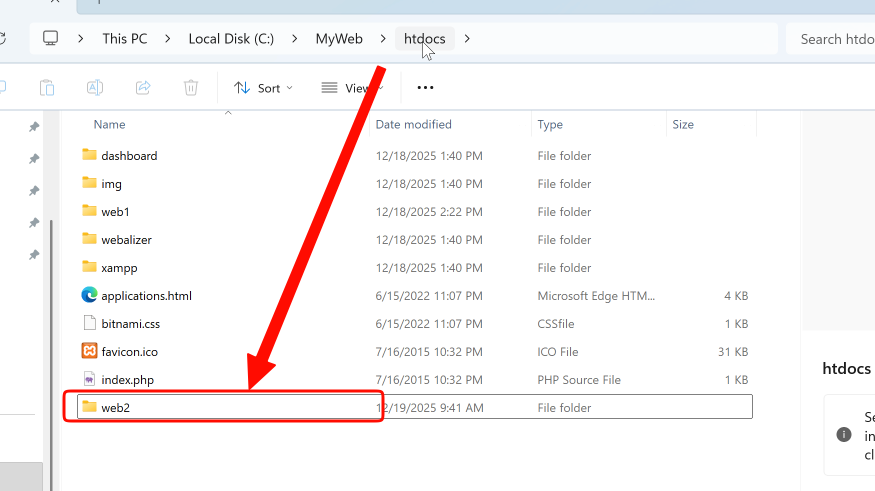
- ทำการสร้าง folder web1 ดังภาพ
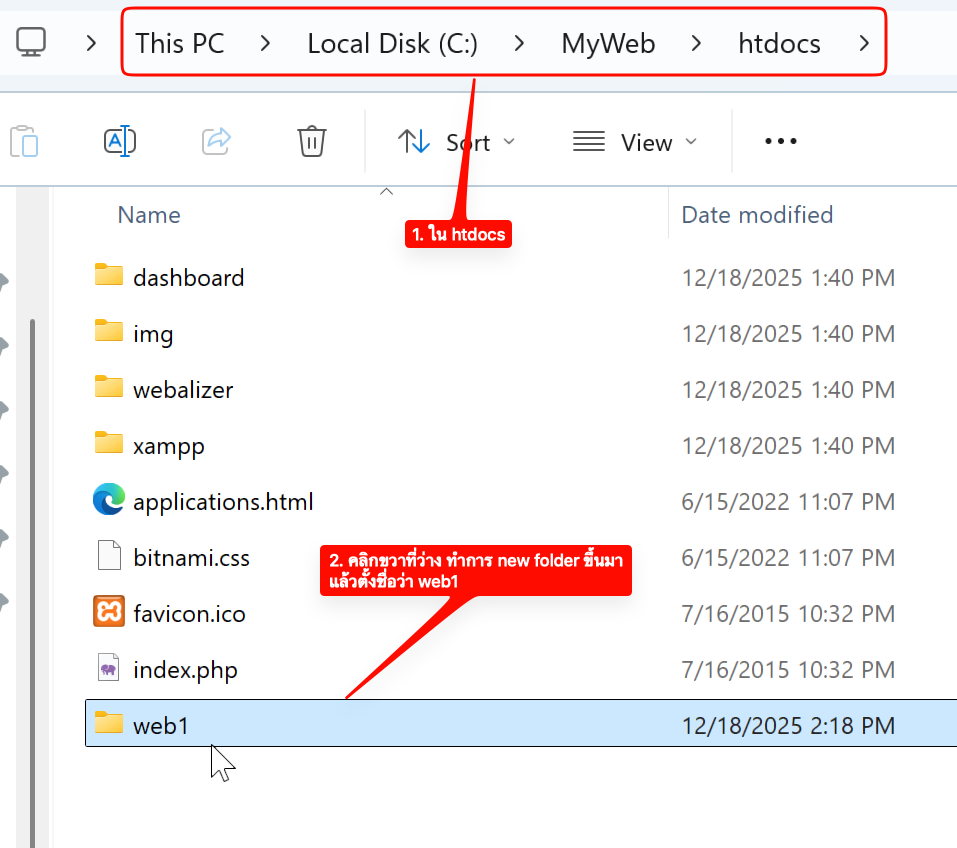
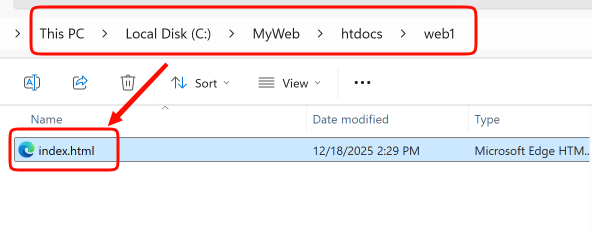
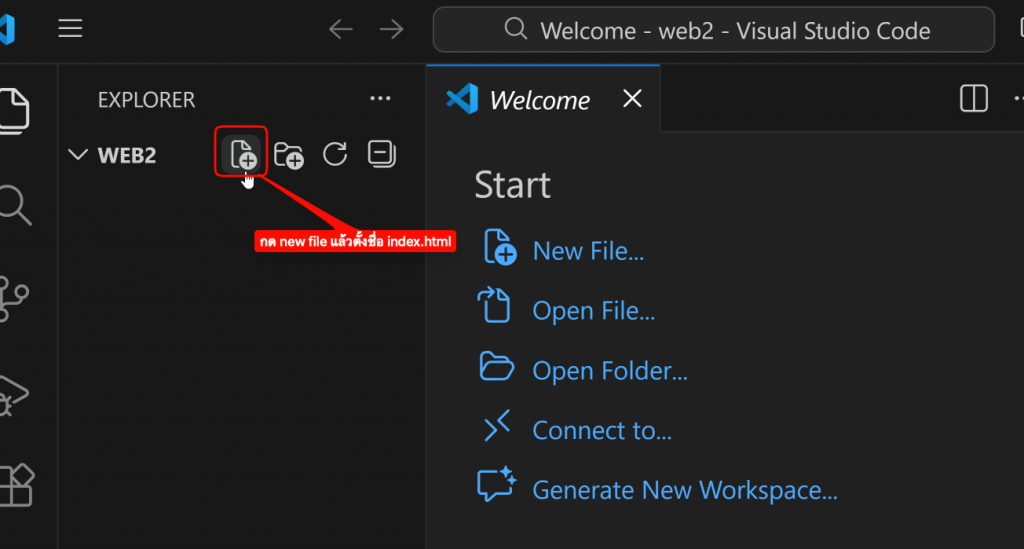
กดเข้าไปที่ web1 คลิกขวาแล้วสร้างไฟล์ index.html
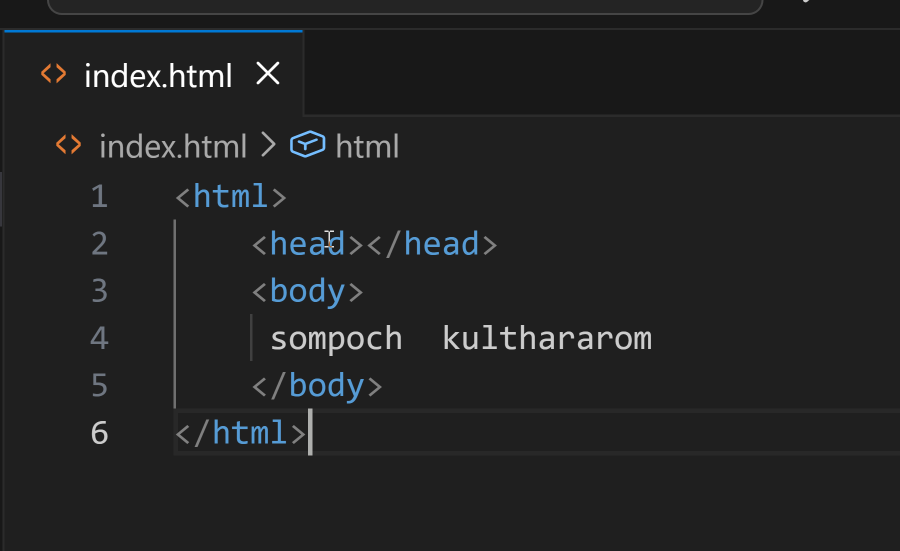
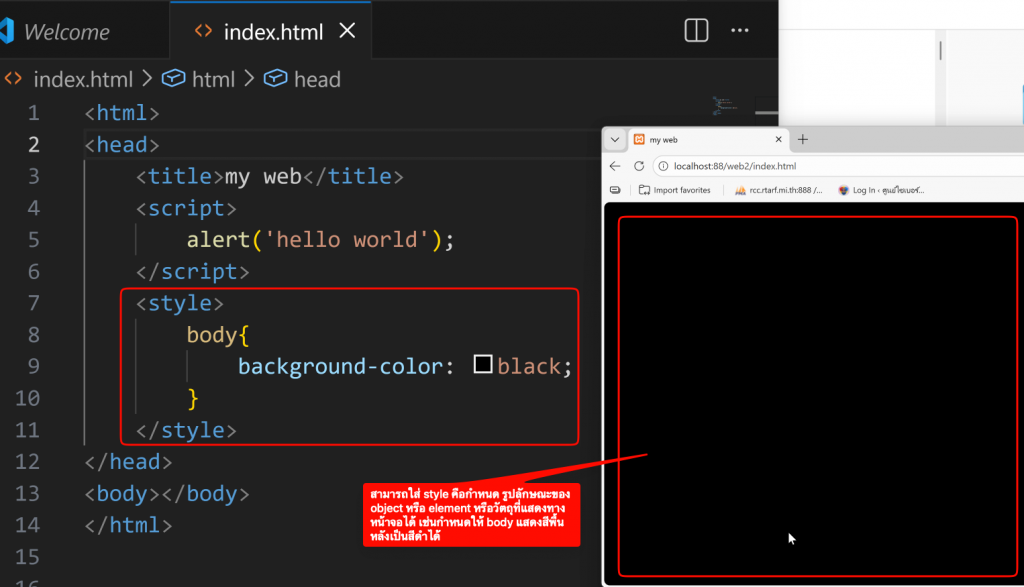
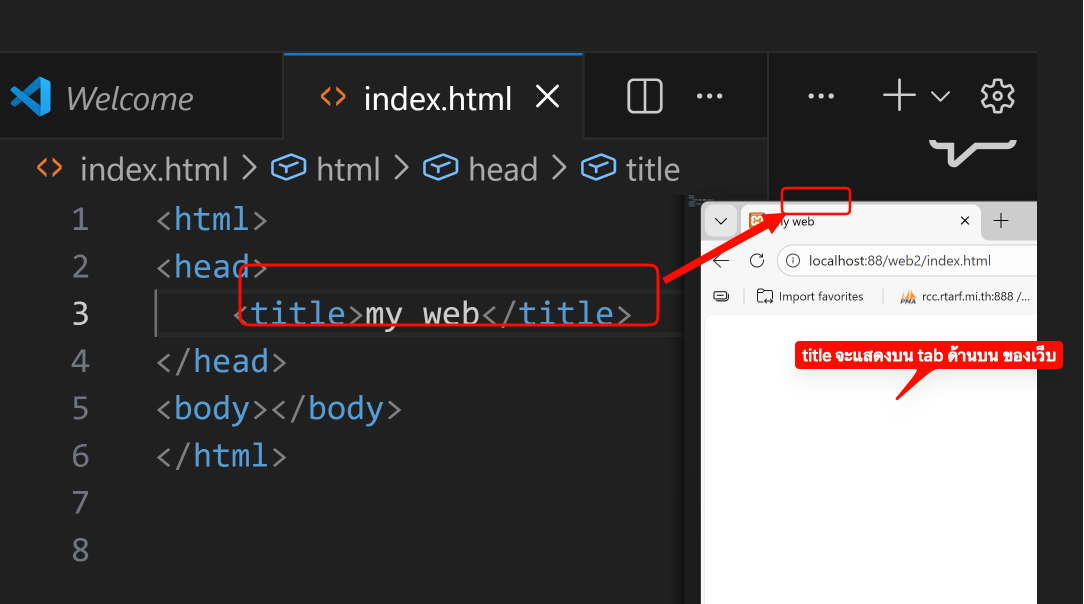
 หลังจากนั้นกด คลิกขวาที่ไฟล์ index.html แล้ว open whith Visual Studio Code แล้วทำการพิมพ์โค้ด HTML ดังภาพ
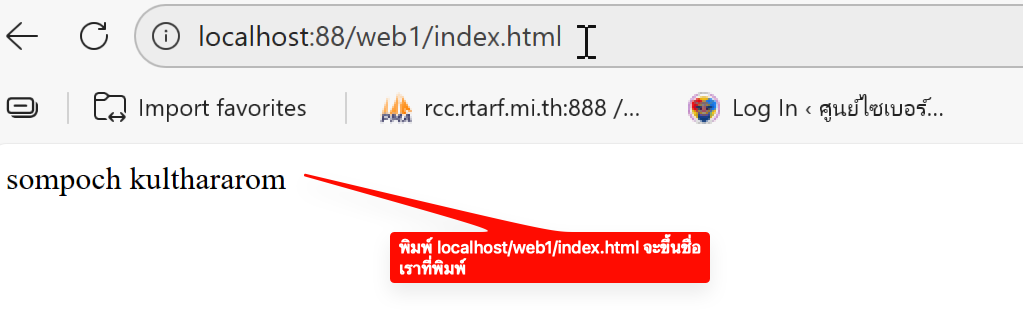
- แล้วกด save แล้วลองเปิด browser แล้วพิมพ์ localhost/web1
- HTML Layout
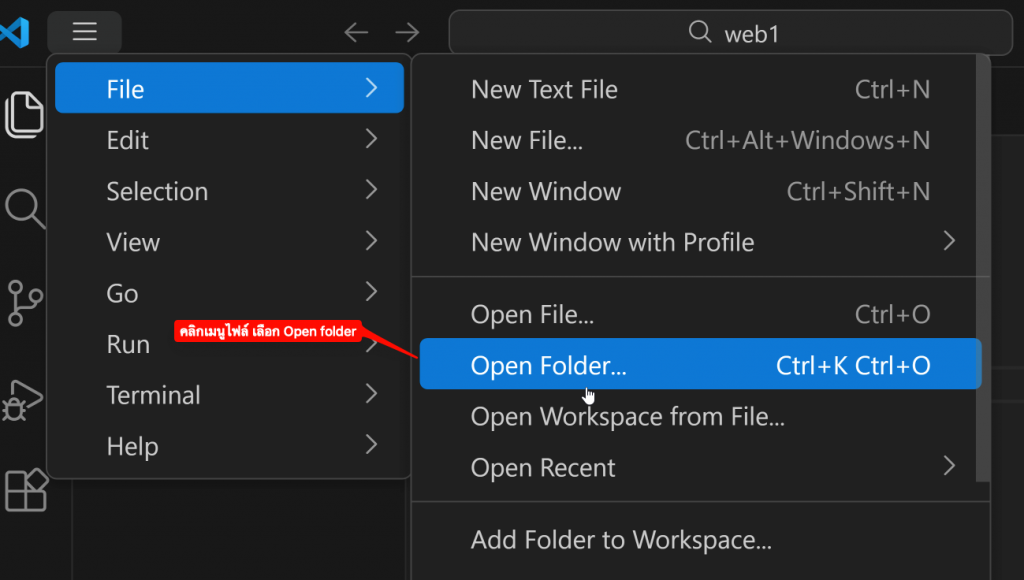
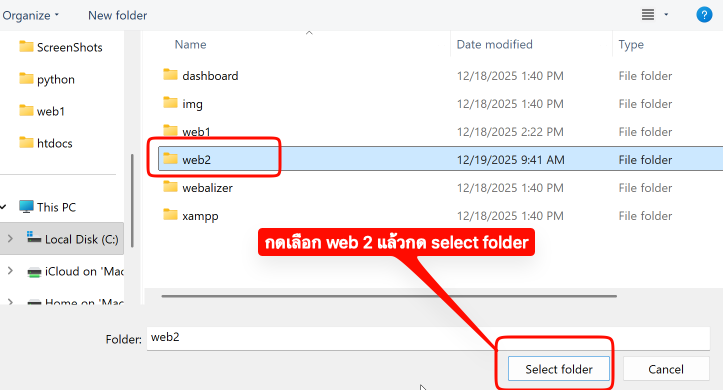
- หลังจากนั้นให้เปิดโปรแกรม Visual Studio Code แล้วเลือก File->Open Folder แล้วเลือก web2 ที่สร้าง
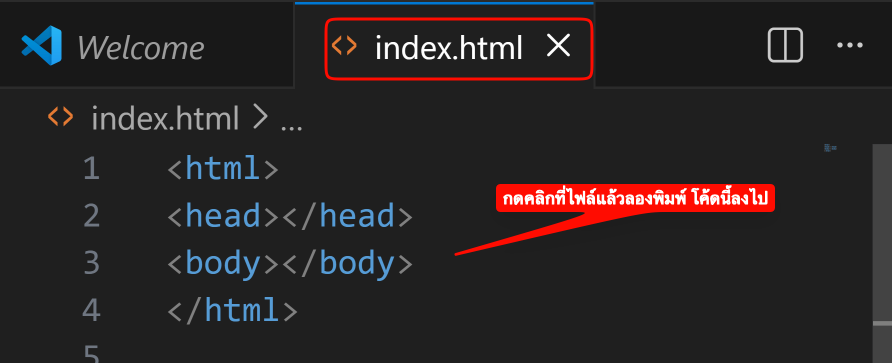
<html>
<head></head>
<body></body>
</html>
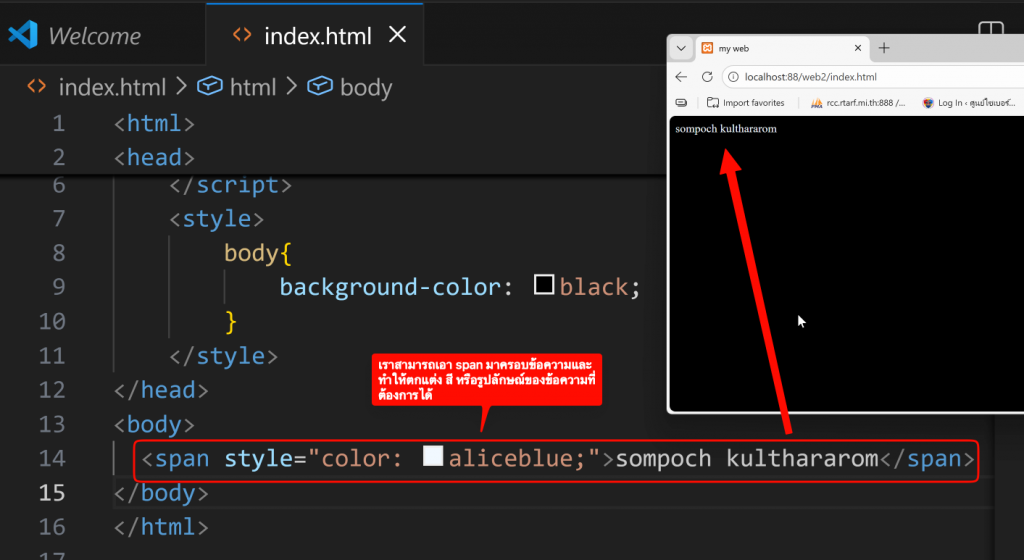
- ในส่วนของ Head ส่วนใหญ่จะประกอบไปด้วย title แสดงหัวข้อบน browser และเรียกพวก javascript หรือไฟล์ stylesheet (css)


<html> <head> <title>my web</title> <script> alert('hello world'); </script> <style> body{ background-color: rgb(19, 238, 191); } </style> </head> <body> <span style="color: aliceblue;">sompoch <br> kulthararom</span> <p style="color: aliceblue;"> jlkjkljklj jghgkghghkgh </p> <div style="color:blueviolet"> <table> <tr> <td> row 1 col 1 </td> <td> row 1 col 2 </td> </tr> <tr> <td> row 2 col 1 </td> <td> row 2 col 2 </td> </tr> </table> </div> </body> </html> - เอารูป หรือไฟล์ ขึ้นหน้าเว็บทำได้ดังนี้
<html><head><title>my web</title><script>alert(‘hello world’);</script><style>body{background-color: rgb(19, 238, 191);}</style></head><body><span style=”color: aliceblue;”>sompoch <br> kulthararom</span><p style=”color: aliceblue;”>jlkjkljklj jghgkghghkgh</p><div style=”color:blueviolet”><table><tr><td>row 1 col 1</td><td>row 1 col 2</td></tr><tr><td>row 2 col 1</td><td>row 2 col 2</td></tr></table></div><!— tag img สำหรับแสดงรูปภาพบนหน้าเว็บ โดยเอา src แล้วตามด้วย link<img src=’..’>–>picture :<img src=”https://img-s-msn-com.akamaized.net/tenant/amp/entityid/AA1ID9ZP.img?w=670&h=402&m=6″><br> pucture my pc: <img src=”cat2.jpg”><br>file : download <a href=”file.zip”>download file</a></body></html>


ดาวน์โหลดโค้ดทั้งหมด web2