
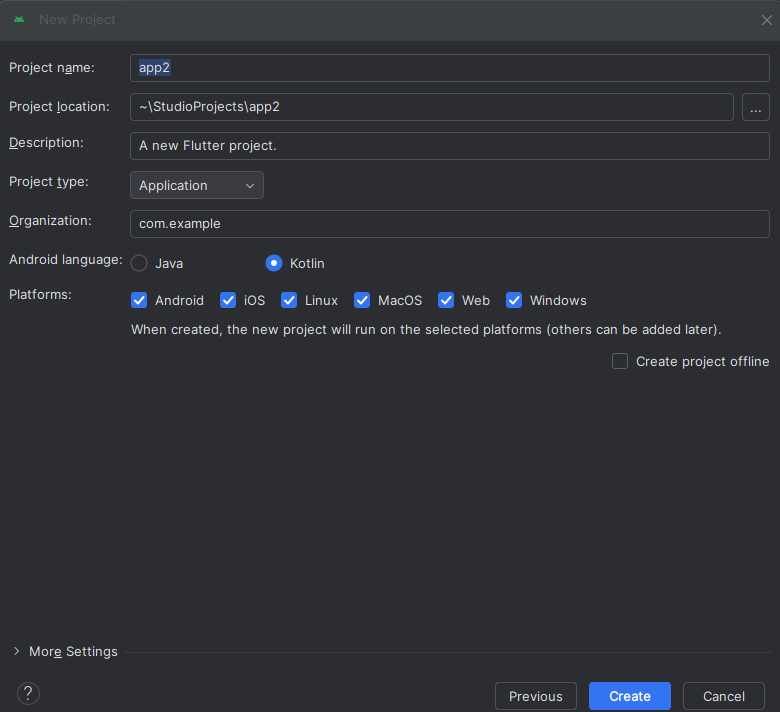
- เปิด android studio แล้วสร้างโปรเจคใหม่ เลือก flutter ตั้งชื่อ app1 กด next จนสร็จ
- ไปที่ device manager ขวามือ
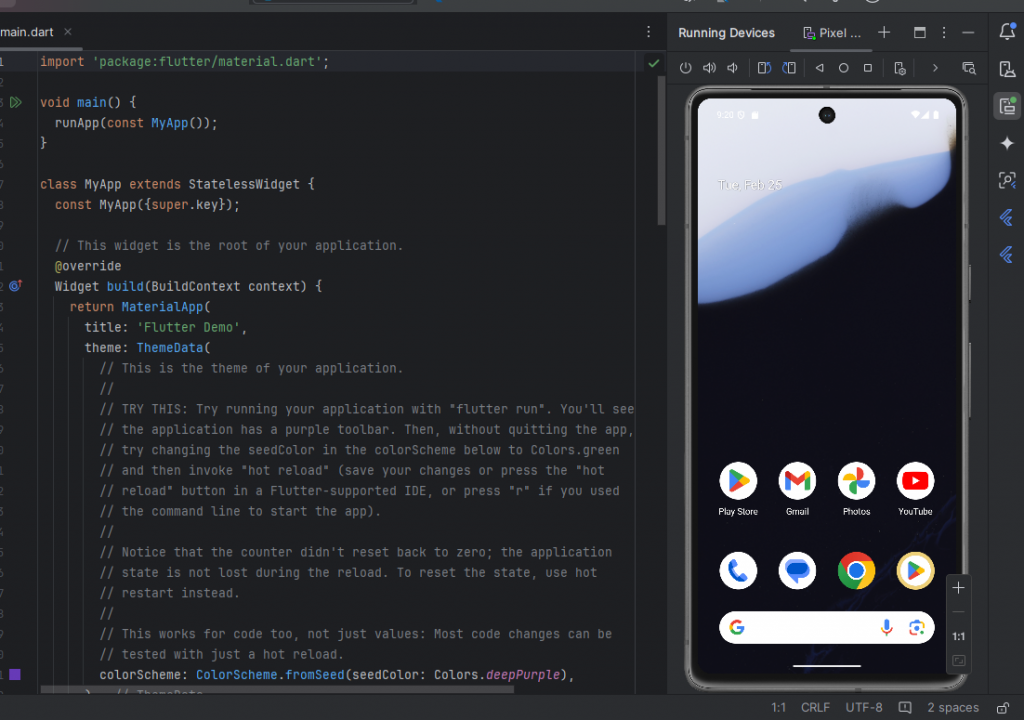
 แล้วเลือก emulator ที่มีอยู่กด icon play เพื่อเปิด emulator android จะได้ดังภาพ
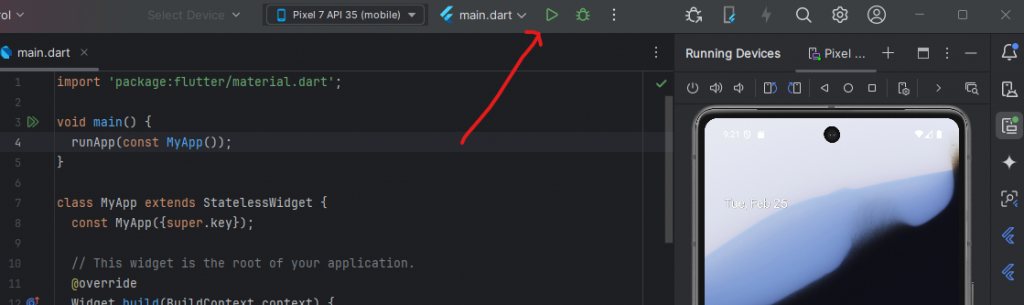
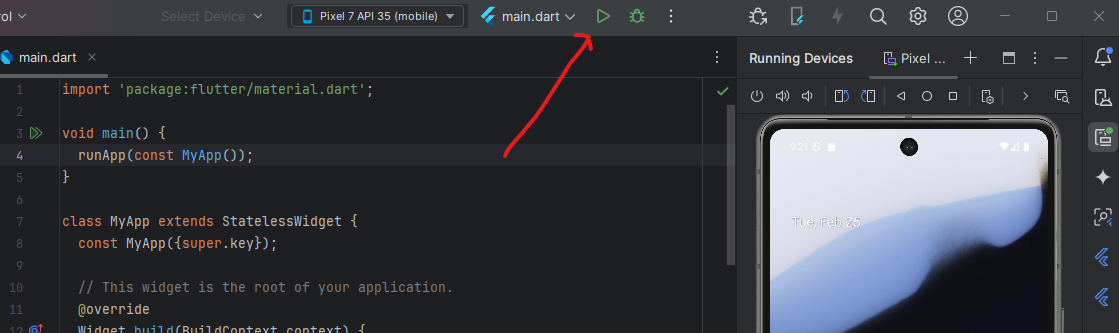
- กด icon play ด้านบนเพื่อ run project
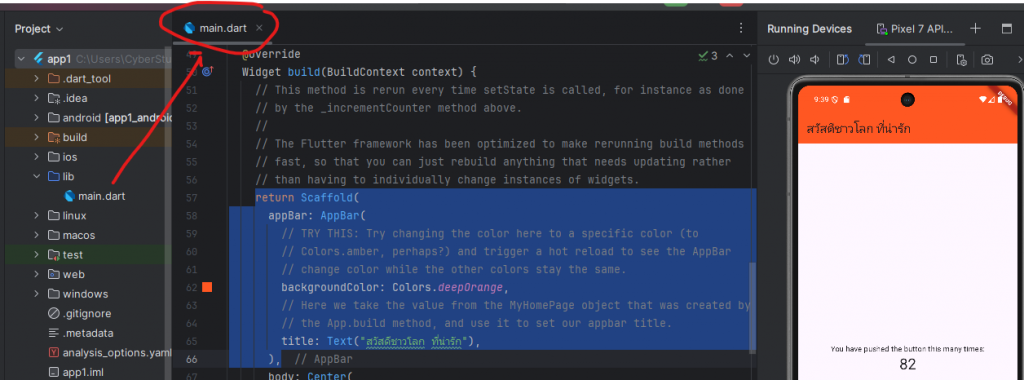
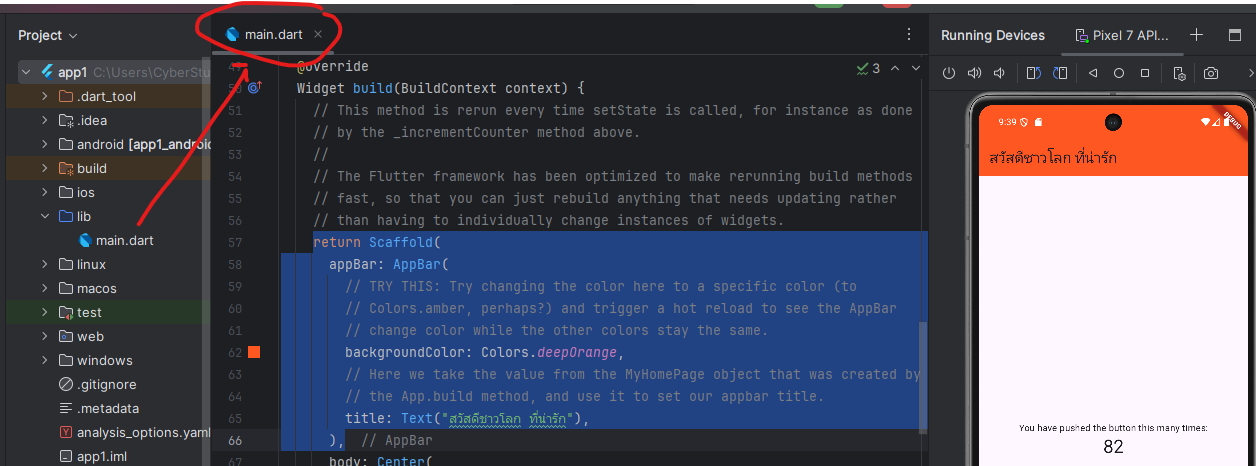
- เปิดไฟล์ main.dart เพื่อแก้ไขโค้ด
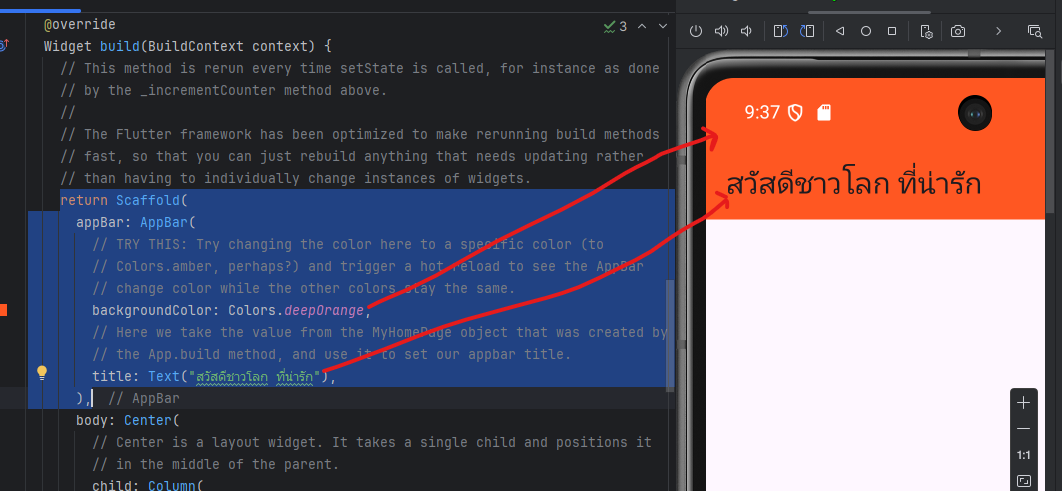
- แก้ไข appbar เลื่อนลงไปเรื่อยๆ หาตรง Scaffold ซึ่งเป็นส่วนแสดงผลหน้าจอ แล้วหา appbar ลองแก้ไขโค้ดดังภาพด้านล่าง
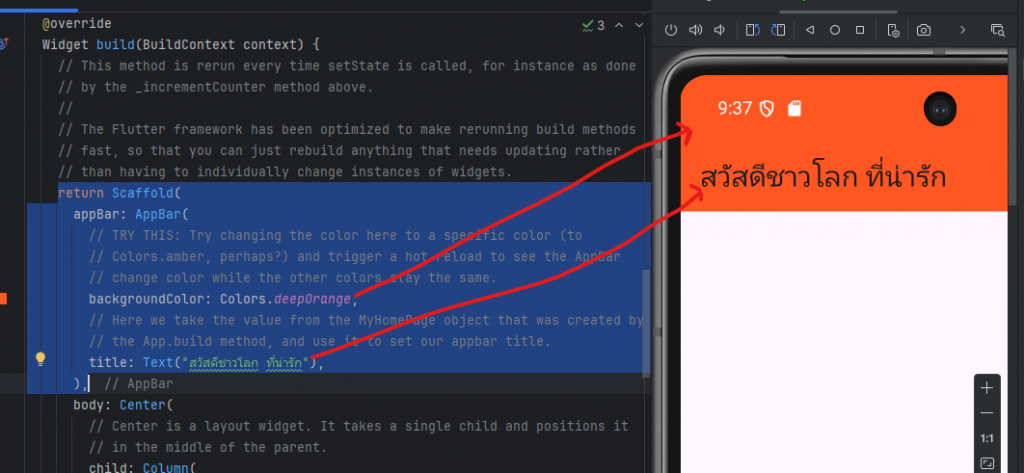 แก้ไขโค้ดเสร็จแล้วกด ctrl+s เป็นการ save สังเกตุแอพใน emulator จะถูกแก้ไขตามที่เรากำหนด
ให้ระวังเรื่องโค้ด ภาษา dart ตัว flutter จะใช้ลูกน้ำ , กั้นตัว widget หรือ code - ลบโค้ดในส่วน body และลบปุ่ม FloatingActionButton จะเหลือโค้ดดังนี้
import 'package:flutter/material.dart';

void main() {
  runApp(const MyApp());
}

class MyApp extends StatelessWidget {
  const MyApp({super.key});

  // This widget is the root of your application.
  @override
  Widget build(BuildContext context) {
    return MaterialApp(
      title: 'Flutter Demo',
      theme: ThemeData(

        colorScheme: ColorScheme.fromSeed(seedColor: Colors.deepPurple),
      ),
      home: const MyHomePage(title: 'สวัสดีชาวโลก'),
    );
  }
}

class MyHomePage extends StatefulWidget {
  const MyHomePage({super.key, required this.title});


  final String title;

  @override
  State<MyHomePage> createState() => _MyHomePageState();
}

class _MyHomePageState extends State<MyHomePage> {
  int _counter = 0;

  void _incrementCounter() {
    setState(() {
      // This call to setState tells the Flutter framework that something has
      // changed in this State, which causes it to rerun the build method below
      // so that the display can reflect the updated values. If we changed
      // _counter without calling setState(), then the build method would not be
      // called again, and so nothing would appear to happen.
      _counter++;
    });
  }

  @override
  Widget build(BuildContext context) {
    // This method is rerun every time setState is called, for instance as done
    // by the _incrementCounter method above.
    //
    // The Flutter framework has been optimized to make rerunning build methods
    // fast, so that you can just rebuild anything that needs updating rather
    // than having to individually change instances of widgets.
    return Scaffold(

      appBar: AppBar(
        backgroundColor: Colors.deepOrange,
        title: Text("สวัสดีชาวโลก ที่น่ารัก"),
      ),

      body: Center(
      ),

    );
  }
}
แก้ไขส่วนของโค้ด body เพิ่ม widget text เพื่อแสดงผลชื่อและนามสกุล
    body: Center(
        child: Column(
          children: [
            Text('สมโภชน์'),
            Text('กุลธารารมณ์')
          ],
        ),
      ),
ต้องการแสดงผลชื่อภาษาอังกฤษต่อจากภาษาไทย จะต้องเปลี่ยนการแสดงผลจาก default column เป็น row จะได้โค้ดดังนี้
 body: Center(
        child: Column(
          children: [
            Row(
             mainAxisAlignment: MainAxisAlignment.center,//ปรับให้แสดงผลของ Row เป็น Center
             children: [
               Text('สมโภชน์'), Text('sompoch'),
             ],
            ),


            Text('กุลธารารมณ์'), //เราจะไม่ยุ่งกับ widget
          ],
        ),
      ),
ปรับนามสกุลให้แสดงผลแบบชื่อ
  body: Center(
        child: Column(
          children: [
            Row(
             mainAxisAlignment: MainAxisAlignment.center,//ปรับให้แสดงผลของ Row เป็น Center
             children: [
               Text('สมโภชน์'),Text('   '), Text('Sompoch'),
             ],
            ),

            Row(
              mainAxisAlignment: MainAxisAlignment.center,//ปรับให้แสดงผลของ Row เป็น Center
              children: [
                Text('กุลธารารมณ์'),Text('   '), Text('Kulthararom'),
              ],
            ),


          ],
        ),
      ),
7. เอารูปเข้ามาใส่ในแอพ ทำได้ดังนี้
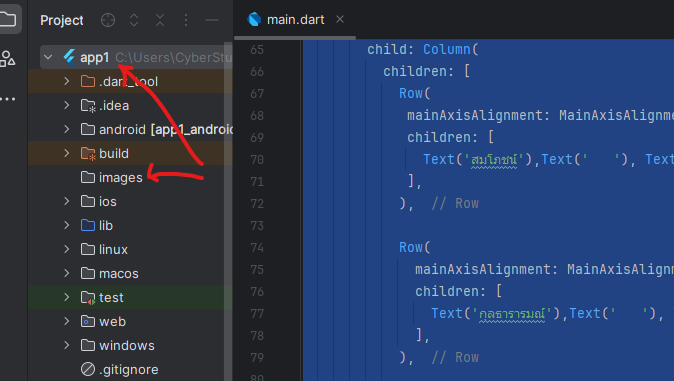
ึคลิกขวที่ชื่อโปรเจค ของเรา คลิกขวาที่ app1 แล้วเลือก new แล้วเลือก directory แล้วตั้งชื่อ images
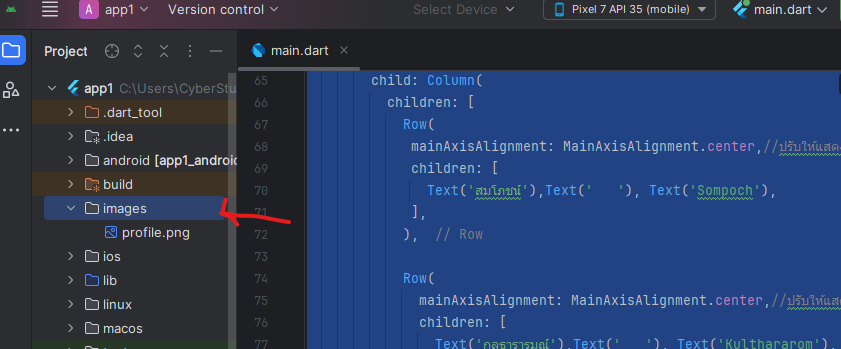
หารูปมาใส่ ในโฟลเดอร์ save แล้ว copy มา paste ใน folder images รูปที่หามาต้องเป็น png (ตั้งชื่อ profile.png) แล้วมาวางดังภาพ
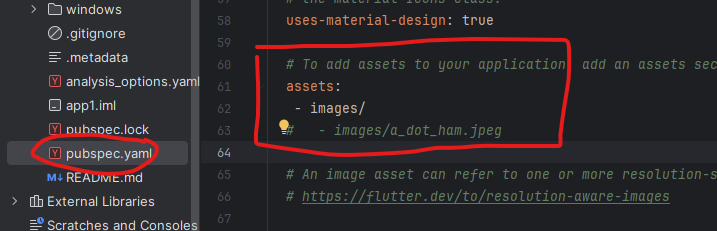
8. ไปเปิดให้ flutter รู้ว่ามี folder images จะเรียกใช้ images ให้ไปกดคลิกที่ไฟล์ pybspec.yaml แล้วเปิดใช้งาน asset ดังภาพ (แก้ไขโค้ดให้เหมือนดังภาพ)
 หลังจากนั้นให้กด pub get ด้านบน (สามารถพิมพ์ pub get ใน cmd ได้ ) เป็นการ save config ของ pubspec.yaml ถ้าเราไม่กดมันจะไม่ทำงาน
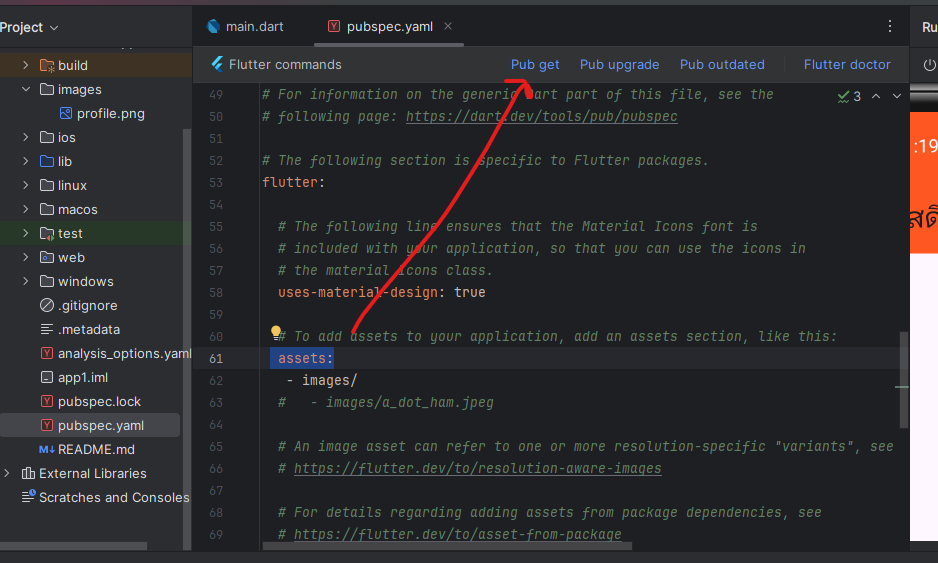
9. เอาภาพไปแสดงในแอพแก้ไขโค้ดในส่วนของ main.dart ดังนี้
import 'package:flutter/material.dart';

void main() {
  runApp(const MyApp());
}

class MyApp extends StatelessWidget {
  const MyApp({super.key});

  // This widget is the root of your application.
  @override
  Widget build(BuildContext context) {
    return MaterialApp(
      title: 'Flutter Demo',
      theme: ThemeData(

        colorScheme: ColorScheme.fromSeed(seedColor: Colors.deepPurple),
      ),
      home: const MyHomePage(title: 'สวัสดีชาวโลก'),
    );
  }
}

class MyHomePage extends StatefulWidget {
  const MyHomePage({super.key, required this.title});


  final String title;

  @override
  State<MyHomePage> createState() => _MyHomePageState();
}

class _MyHomePageState extends State<MyHomePage> {
  int _counter = 0;

  void _incrementCounter() {
    setState(() {
      // This call to setState tells the Flutter framework that something has
      // changed in this State, which causes it to rerun the build method below
      // so that the display can reflect the updated values. If we changed
      // _counter without calling setState(), then the build method would not be
      // called again, and so nothing would appear to happen.
      _counter++;
    });
  }

  @override
  Widget build(BuildContext context) {
    // This method is rerun every time setState is called, for instance as done
    // by the _incrementCounter method above.
    //
    // The Flutter framework has been optimized to make rerunning build methods
    // fast, so that you can just rebuild anything that needs updating rather
    // than having to individually change instances of widgets.
    return Scaffold(

      appBar: AppBar(
        backgroundColor: Colors.deepOrange,
        title: Text("สวัสดีชาวโลก ที่น่ารัก"),
      ),

      body: Center(
        child: Column(
          children: [
            Row(
             mainAxisAlignment: MainAxisAlignment.center,//ปรับให้แสดงผลของ Row เป็น Center
             children: [
               Text('สมโภชน์'),Text('   '), Text('Sompoch'),
             ],
            ),

            Row(
              mainAxisAlignment: MainAxisAlignment.center,//ปรับให้แสดงผลของ Row เป็น Center
              children: [
                Text('กุลธารารมณ์'),Text('   '), Text('Kulthararom'),
              ],
            ),

            Image(image: AssetImage('images/profile.png'))

          ],
        ),
      ),

    );
  }
}
10. การเรียกใช้ icon สามารถใช้คำสั่ง Icon(Icons.ตามด้วยชื่อไอคอน)
Icon(Icons.phone),//widget icon
11.การปรับ style text สามารถกำหนดได้หลัง Text(‘ข้อความ’,style:)
Text('สมโภชน์',
              style: TextStyle(fontSize: 24,color: Colors.lightBlue)
     )

Code Body ที่ปรับแก้แล้วมีดังนี้
body: Center( child: Column( children: [ Row( mainAxisAlignment: MainAxisAlignment.center,//ปรับให้แสดงผลของ Row เป็น Center children: [ Icon(Icons.phone),//widget icon Text('สมโภชน์',style: TextStyle(fontSize: 24,color: Colors.lightBlue),), Text(' '), Text('Sompoch',style: TextStyle(fontSize: 24,color: Colors.lightBlue),), ], ), Row( mainAxisAlignment: MainAxisAlignment.center,//ปรับให้แสดงผลของ Row เป็น Center children: [ Text('กุลธารารมณ์'),Text(' '), Text('Kulthararom'), ], ), Image(image: AssetImage('images/profile.png')) ], ), ), // end body
 แล้วเลือก emulator ที่มีอยู่กด icon play เพื่อเปิด emulator android จะได้ดังภาพ
 แก้ไขโค้ดเสร็จแล้วกด ctrl+s เป็นการ save สังเกตุแอพใน emulator จะถูกแก้ไขตามที่เรากำหนด